justinpbrown71
-
Posts
125 -
Joined
-
Last visited
Everything posted by justinpbrown71
-
RAF Images Colour Desaturated
justinpbrown71 replied to justinpbrown71's topic in V2 Bugs found on Windows
But, the X-T5 has no option to turn off Film Simulation. This then would mean that whatever image I see in the EV or on the screen of the X-T5 I will never be able to import into AP2 (and possibly other processing softwares) if I shoot in RAW. Why then would Fuji bake Film Simulation into their camera hardware? Surely it would put off most photographers who shoot in RAW... -
RAF Images Colour Desaturated
justinpbrown71 replied to justinpbrown71's topic in V2 Bugs found on Windows
I can't find lens correction in Capture One Express trial. Though I have read that Fuji X series cameras auto-correct lens distortion in camera, so it should already be done. Which, in turn, begs the question of why the distortion is obviously corrected by AP2 in raw developer (unless it's a glitch, the X-T5 not being amongs the list of suppported cameras), if it is already supposed to have been done in-camera. -
RAF Images Colour Desaturated
justinpbrown71 replied to justinpbrown71's topic in V2 Bugs found on Windows
I just noticed the exclusion of the X-T5 from that list too... I don't want to spend 350 on buying Capture 1 to process this one shoot (as until the X-T5 is added to AF2 I will shoot in jpg) just so that I can access the lens correction tool, which doesn't seem to be available in the trial version. I'll just have to use AF2 and massively increase the saturation of the images from this shoot. -
RAF Images Colour Desaturated
justinpbrown71 replied to justinpbrown71's topic in V2 Bugs found on Windows
Thank you. But then why is the raw data of the image so desaturated? To get the image colour approximately the same as is displayed in-camera and in the other softwares shown above, I need to apply full saturation and vibrancy in the AF2 RAW Developer. -
RAF Images Colour Desaturated
justinpbrown71 replied to justinpbrown71's topic in V2 Bugs found on Windows
The Develop Assistant settings are at default; Tone Curve is off. I have updated the post. -
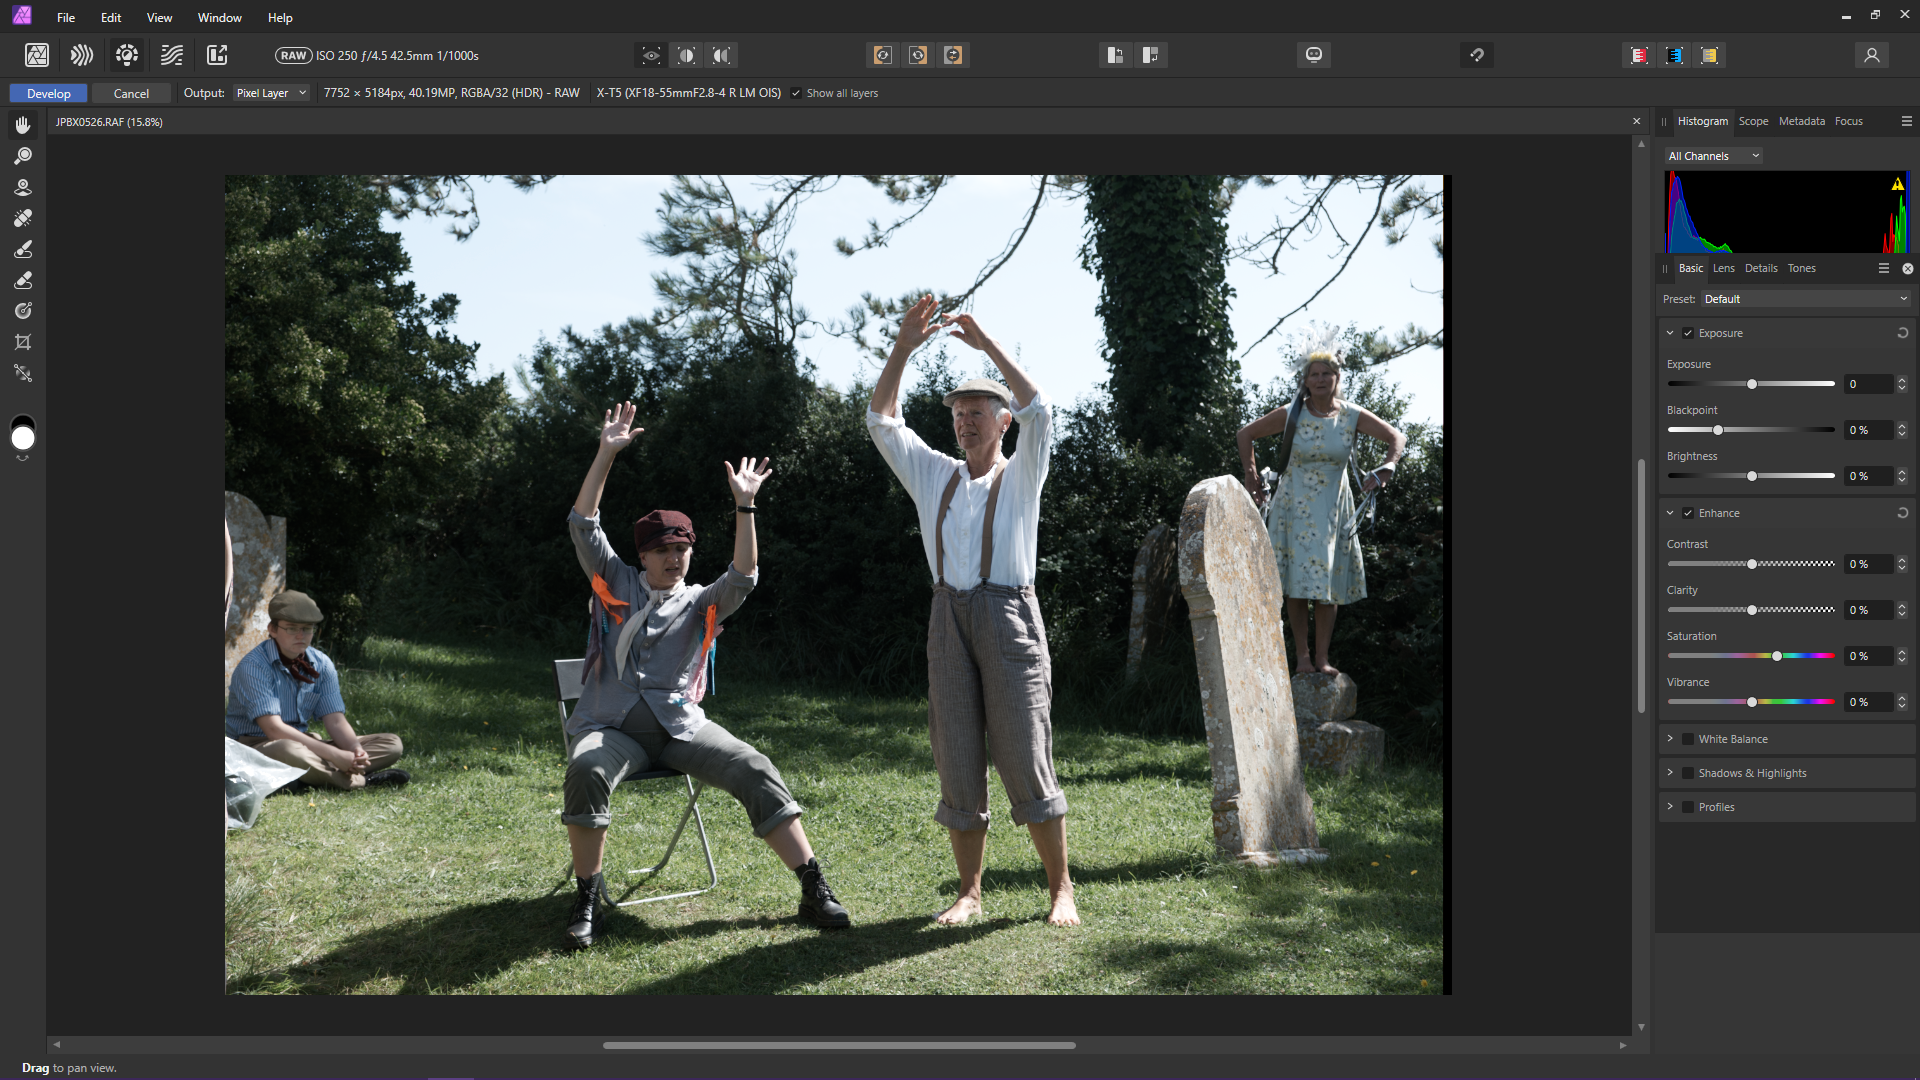
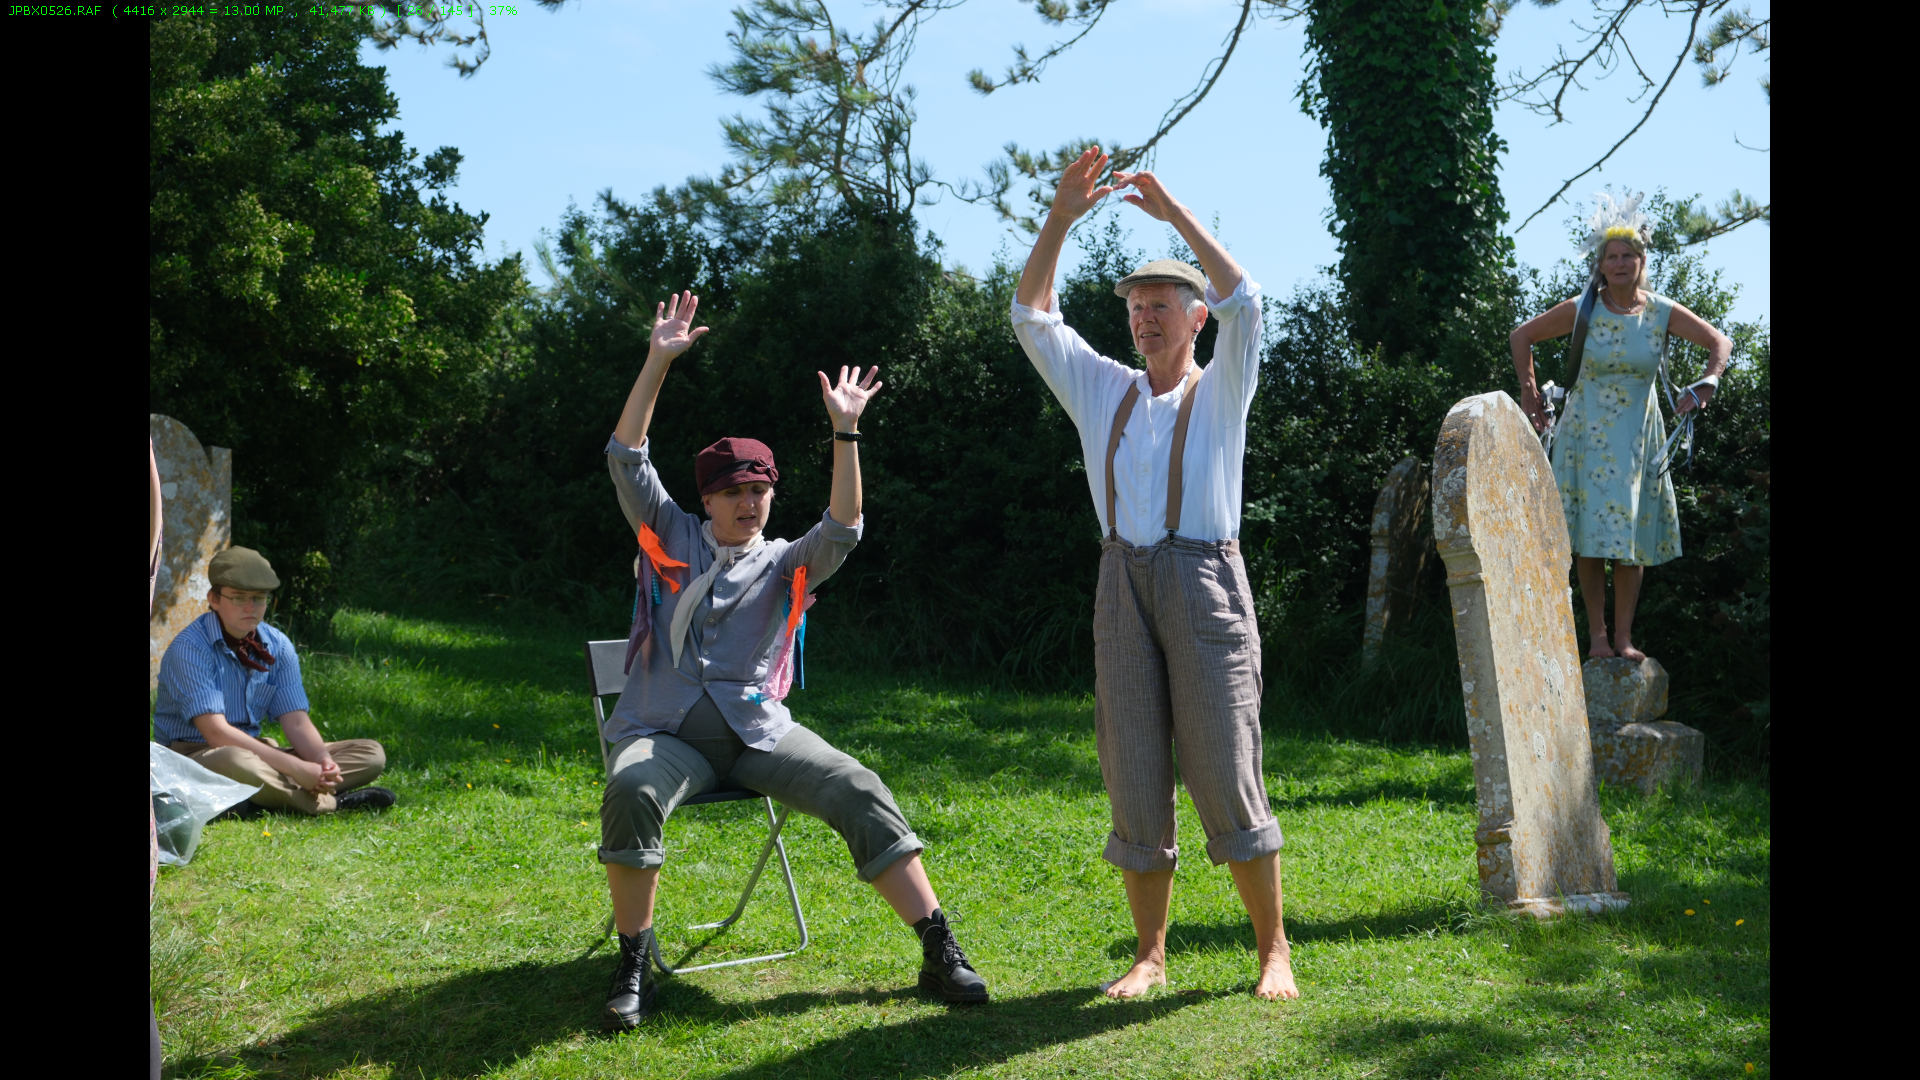
I just bought a Fuji X-T5 and did my first shoot set to RAF with unadjusted Provia STD film simulation. The RAF images load into XnView MP and Faststone showing the colours correct as captured, but when I load the RAF into Affinity 1 or 2 the colours are very washed out. Also, until I add lens correction in AF2 there is a black vertical bar along the right edge of the image. See uploaded files. UPDATE: Having just batch converted them into jpgs using Faststone they are resolved into two files per image file: one totally black image with the original file name, and a second with the image desaturated and the file name with added suffix: '_result' UPDATE: I have added a screenshot of the image in Capture One which seems to show heavier blacks incurring a loss of shadow detail, and perhaps added contrast increasing the colour saturation very slightly. UPDATE: I have added a screenshot of the image in AF2 with the lens correction applied. Notice how the black vertical bar, to the right of the image, is now curved. UPDATE: Further... I have tried setting the X-T5 to shoot RAW+JPG with a B&W Film Sim. When I import the RAF to AP2 it appears in correct RAW colour, and when lens corrected the black bar disappears (though it is there without the lens correction). So, it seems that the only way to achieve a non-film simulation colour RAF is to shoot in both RAW+JPG. I wonder why Fuji haven't provided an option to shoot RAW without a film sim...

-
I am using the latest version of Photo 2. When I load a new RAW file, the correct lens preset (which I have named) is shown in the preset window (and the lens distortion correction applied), but the Chromatic Aberration Reduction and Lens Vignetting settings I have saved to this preset are not been applied. I then select default, which shows the lens distortion being re-applied, before selecting my lens preset which then re-applies the lens distortion correction and applies the Chromatic Aberration Reduction and Lens Vignetting settings I have saved to it. Is it as bug that the Chromatic Aberration Reduction and Lens Vignetting saved settings of my preset are not applied as the RAW image is uploaded? Or, is there an automatic lens detection which applies the distortion correction regardless of which preset is shown in the preset window as previously selected for a prior RAW image being uploaded for processing?
-
Is it possible to save settings of a Live Filter as a preset? I want to save presets of specific Vignette, Unsharp Mask and High Pass settings that I use frequently. Thanks.
-
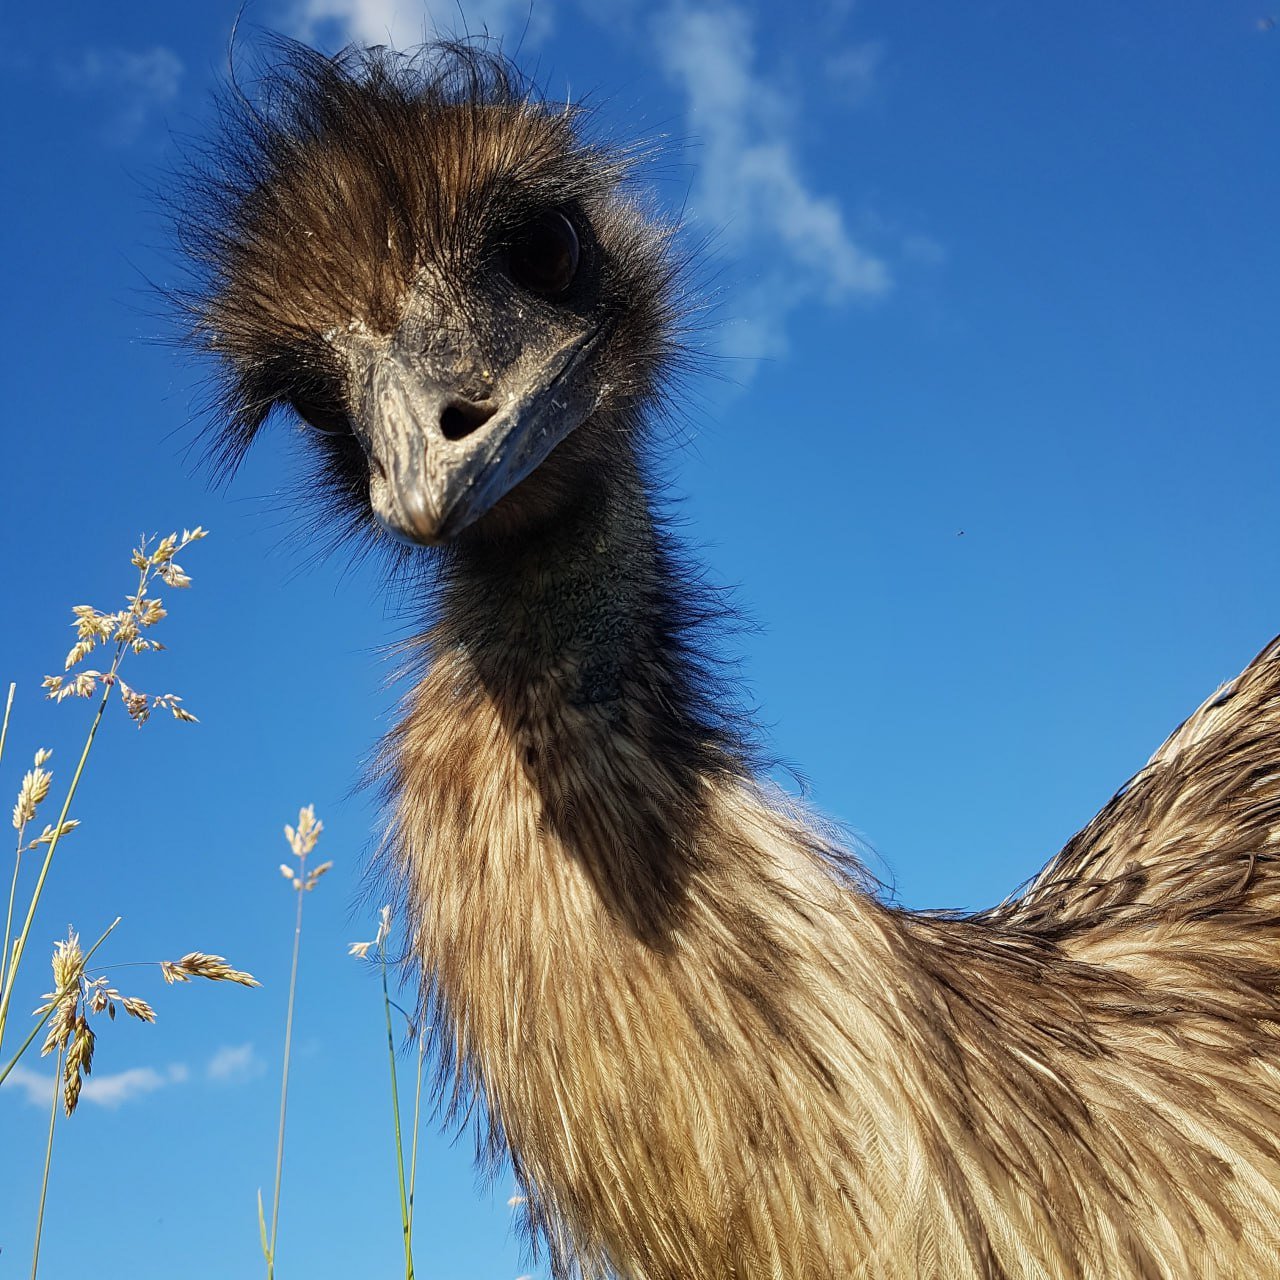
These emu images are terrible, though you can use them if you want. They were taken by a friend on a mobile phone. Next time I'm at the field (within the next few days), and there's a blue sky as a background, I'll take some better photos of the emu and post them here for you to use. Or alternatively, I have some images here that might suit your purpose: https://postimg.cc/gallery/mgBbcFG
-
Thanks for all your assessing and troubleshooting. I really appreciate it. I haven't yet had the opportunity to review all your points, but will do so over the ensuing days. Again, many thanks for your thoroughness and testing.
-
Hi, thanks for your reply. But the darkening effect is happening only on the edges of the subject, where I have used the refining brush. The grey patches also appear where the refining brush has been used. The rest (majority) of the subject remains the same when layered over a copy of itself.
-
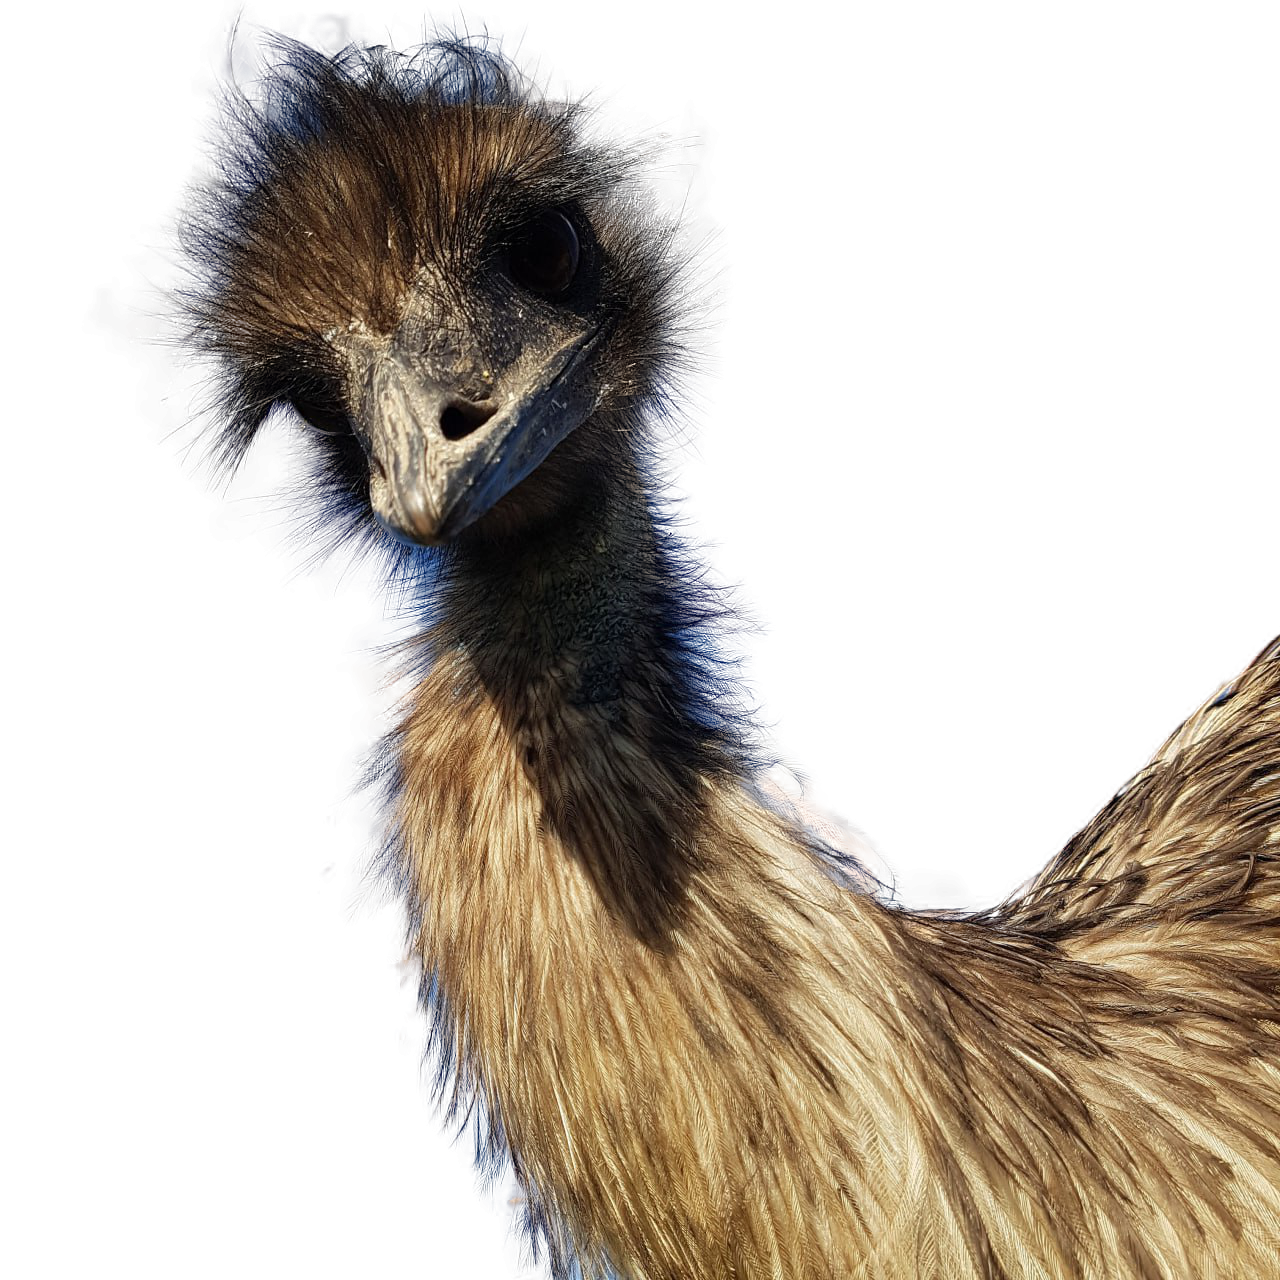
The three images below show the subject in: 1) The original image layer 2) The new refined layer and mask of the subject 3) Number 2 on top of number 1. Why has the feathered outline area (around the head and neck) that I manually Refined, turned much darker than the original image? This is noticeable both in 2) and 3). Also, often when I select an area and Refine it, the subsequent new layer and mask show a lot of grey patches where I have manually Refined. I usually erase these, but then the original image layer becomes visible beneath, and this is often noticeable enough to render the new layer and mask unuseable.
-
In the end I decided to delete all traces of the ggl Nik Collection from my machine, download and re-install it (V1.2.11). Now it works fine.
-
Thanks Richard, but the linked information you've provided applies to DXO Nik Collection Vs 4 & 5. I have the ggl Nik Collection V3.
-
Hi Ron, Thanks for your input. I have moved the ggl nik collection folder to the same location as you have yours, rebooted and restarted AP, but there are no plugins detected at all now. Does AP not point to the folder automatically, or do I have to do it manually? I don't remember doing this before. Thanks.
-
Hi Michael, Have you found a solution? I have just updated V1 to the 1.10.6 and have the same problem. I add the plugins in the usual way, but they don't respond anymore when I click on them.
-
Thanks for the info. There's no point in posting any jpgs. I don't think they're the problem, as it's happening with every jpg file. I've processed hundreds of jpgs with Silver Fx Pro in AP and never encountered this issue before. My workflow hasn't changed. Perhaps I'll uninstall and reinstall AP and Nik Efex. Perhaps the ggl versions of Nik Efex are no longer compatible with AP2, even though they show the 'working' status in the PS plugins panel.
-
Hi R C-R, Thanks for your reply. The image bit depth is 24. I've never had to change this before. Usually I just import a jpg into AP and, after making the required adjustments, select the Nik Efex Silver Pro 2 plugin which immediately opens its own window with the jpg ready for b&w processing.
-
Thanks Richard, but I'm working with pixel layer images, not RAW ones.
-
I have the trial version of AP2 and the Google Nik Efex plugins are detected as working in Preferences>PS Plugins, but when I select them, from the Filters dropdown menu, they don't open. There's no error message, and the action 'plugin' appears in the History panel. They work fine in AP1.
-
Thanks loukash, but the issue I have never used to be an issue, so there has been a change made somewhere in the default settings or there is a bug. When cropping an image It shouldn't be necessary to make a pixel selection, nor open a different app and then return to the cropping process, to activate snapping to the edges of the image.
-
I have an issue with snapping: For example, I use the crop tool to select a ratio of 16:9, resize to select a small inner portion of the photo and apply. Afterwards I decide I would prefer a 16:10 ratio. I then select the 16:10 ratio and drag from a corner of the cropped photo to snap to the original edges of the photo (set to Reveal), but no snap line there is detected; the only snap lines that are detected are the green central vertical one and the previously established 16:9 edges. In this case I have to guess, or zoom in to set my desired crop exactly at the edge extent of the original photo. Which snap settings do I need to apply to snap to the edges of the photo in this scenario? Thanks. (Also, is there any way to prevent the last-used ratio being applied automatically to an image upon opening the crop tool? Every time I open the crop tool I have to select Reset and Original Ratio from the dropdown menu to have my image appear in its original state. (I have created and saved Custom vertcial ratios, so when I change the ratio of a portrait it doesn't auto-apply a horizontal one!!!))
-
carl123, thanks for pointing me to that link. That's way too long a process and not suitable at all for me. I process the initial functions as mentioned above, but I also often batch process the exposure and shadows, and quickly tweak individual ones if necessary. I also rename the files on import into LR. So far there's nothing in V2 that I find alluring, and the layers panel changes have impacted me negatively.
-
I agree. The picture icons are unnecessary when the layers are already named. They ought to be optional. I use long names for many of my layers, which are sometimes repeated over several layers, but with different suffixes. There won't be enough space for these names anymore, because of the size of the icon informing me that I have a vibrancy layer, which I already know. I also agree about the columns for collapsing groups. A good idea for sure, but I prefer a clear visual aspect to the panel, and am happy to move the mouse cursor up to select collapse, as in V 1. Again, it needs to be optional. I am trialling V2 at the moment, but so far I haven't seen anything that makes me want to buy it. The thing I want most is batch processing RAW images from a shoot, (for camera calibration, lens corrections, file renaming, etc), which I do in LR before importing them individually into AP for the main work processes. Thanks for the link. I'll be following the feedback responses in due course.
-
Thanks François. Is there also a way to remove the large icons which appear to the left of the layer image and indicate the applied layer adjustment?