

DBerlin81
-
Posts
18 -
Joined
-
Last visited
Posts posted by DBerlin81
-
-
-
18 hours ago, GarryP said:
I've just exported your document to PDF and it looks fine to me at 800%.
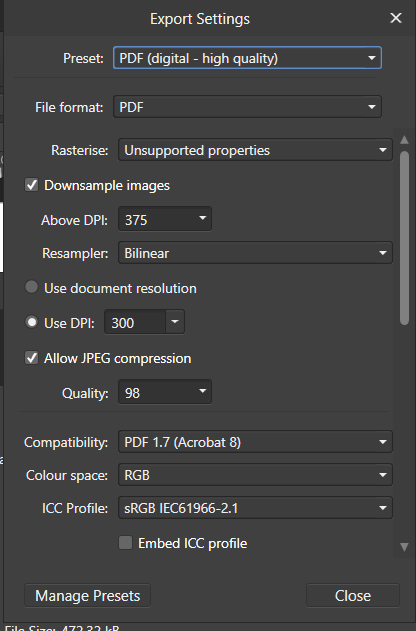
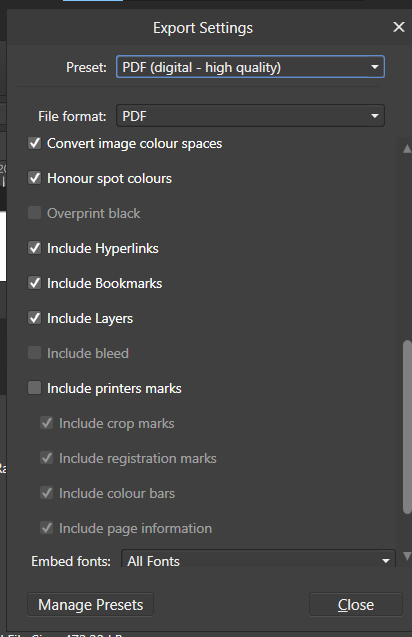
Can you give us a screenshot showing us your Export Settings? (File -> Export - More Button)I noticed that your light green ellipse shape is set to 50% Opacity so that might have some adverse effect in certain PDF formats.
I would advise not using Opacity to create a lighter colour; use Tint instead, or just select a lighter colour.
Opacities of less than 100% can sometimes give you problems down the line depending on how you export.Amazing! Thanks so much. The opacity setting solved it. Learned something again. 🙂
-
Hello everyone,
I have a similar issue with the attached file. I am designing a logo for a logo contest in different versions and for an easier overview of the versions in a .pdf I inserted them as .eps (all created from the same .afdesign file) into an affinity publisher document. For some reason, the green eliptical curve behind the letter is the only item that ends up pixelated in the .pdf. Even more confusing is that I have a version of the exact same items in black and white and there the eliptical item is fine, no pixels. This isn't in the file, that I dressed down to just the basics for this forum.
I also inserted a screenshot of the pixelated .eps in Publisher.Help please! 🥴

Pixel issue with green elipse in eps in Publisher_affinityforums.afdesign
-
-
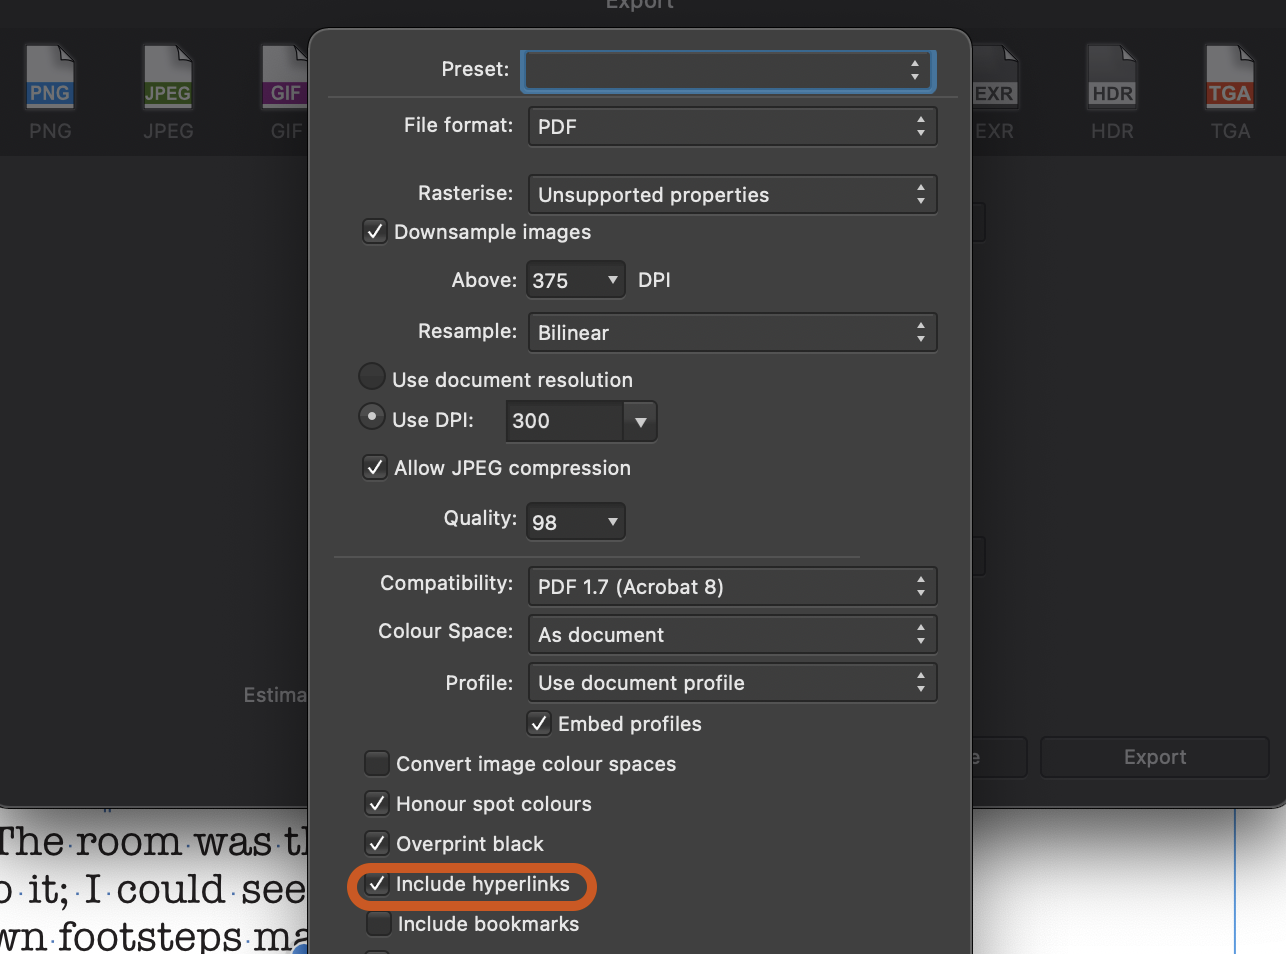
So, just to kind of get back to the original query: I am using Publisher 1.9.1.797. And I can easily create a Hyperlink, insert an URL. Easy. But when I open the exported PDF the link isn't clickable, though highlighted as usual. What am I missing? I couldn't find any settings in the export process relating to hyperlinks and the hyperlink menu within Publisher doesn't offer any additional settings. What am I missing?
Thanks in advance. -
On 2/3/2020 at 3:42 PM, stokerg said:
Hi Jefmt3 and Welcome to the Forums,
On the Page that the Master Page is applied to, look in the Layers Panel and right click on the Master Page layer and select Edit Detached. You can now click and drag the items in the Master Page Layer outside of the Master Page Layer so they become a normal layer (can provide screen recording if needed).
Once you've done that, you can then delete the Master Page
")
GOT IT! And just in case someone else is as slow as I was in getting this right:
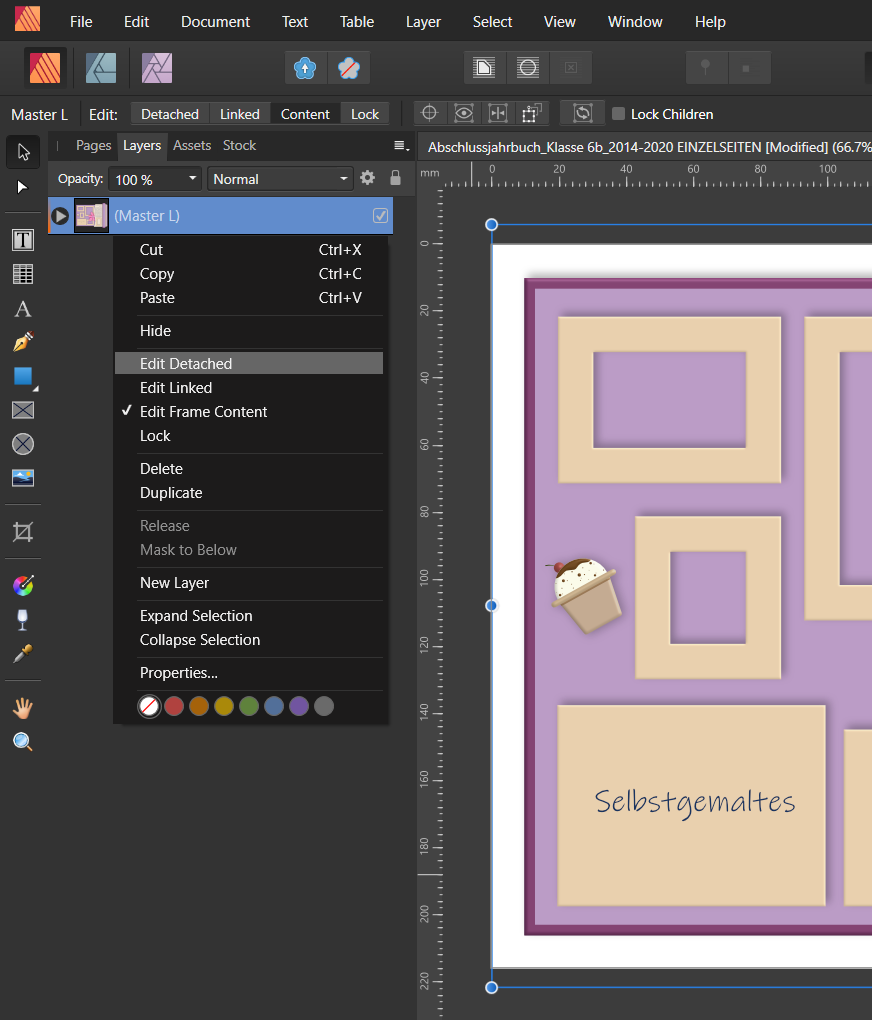
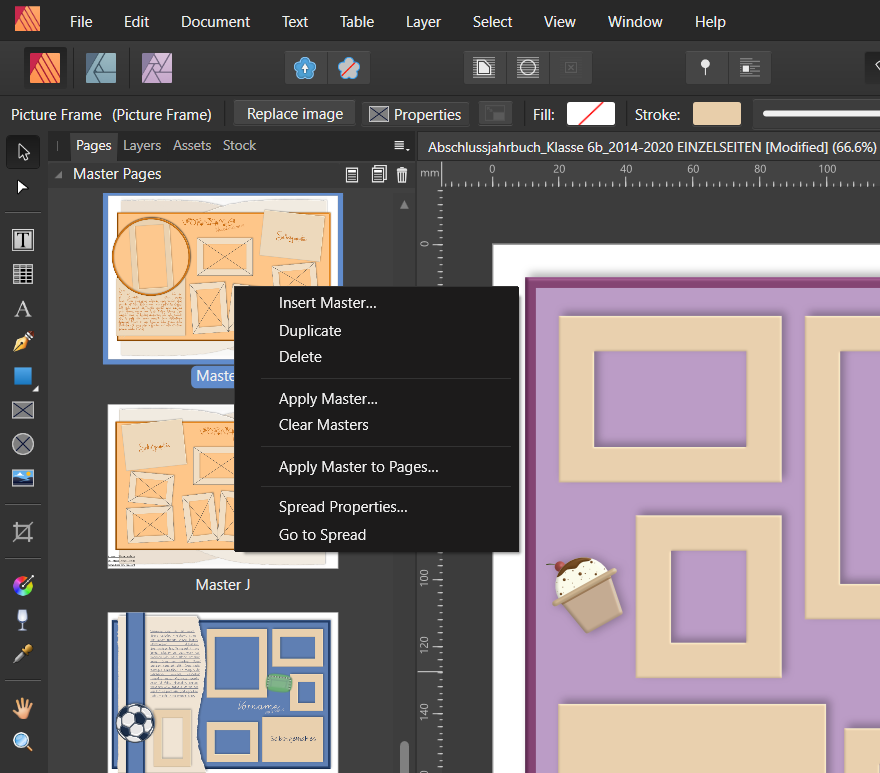
What this image doesn't show is, as explained in the quote ⬆⬆⬆⬆ , you apply the Master Page to your desired page and with that "final" page activated, you go into the Layers Panel and right click on the Master layer as shown in the image here. -
On 2/16/2020 at 8:28 PM, Old Bruce said:
I assume you mean you want to get rid of/alter things from the master pages. Use the Layers Panel and right click on the Master Page in there and choose Edit Detached from the context menu. You have to right click on the actual Master Page, not the individual layers within the Master Page.
Unfortunately, I can't find that "Edit Detached" option anywhere. The screenshot is what I understood I was supposed to do from your instruction. I tried finding "Edit Detached" elsewhere. No luck.
But also, I do not want to change the settings of the actual master page. I want to make individual changes on the individual pages that a master was applied to. So, i.e. I want to insert images into the place holders and then maybe move them around a bit, change size according to the differeing images I was given for the individual pages. The master pages are supposed to stay as is. This is how I was used to working in Adobe and it seems it should be possible somehow in Affinity, as well. 🤷♀️ -
On 2/3/2020 at 3:42 PM, stokerg said:
Hi Jefmt3 and Welcome to the Forums,
On the Page that the Master Page is applied to, look in the Layers Panel and right click on the Master Page layer and select Edit Detached. You can now click and drag the items in the Master Page Layer outside of the Master Page Layer so they become a normal layer (can provide screen recording if needed).
Once you've done that, you can then delete the Master Page
Will this also help me? I am making a yearbook for my kid's class. I set up several Masters that I then apply to the kids' individual pages. I do want to make occasional changes to the Masters' presets on the pages. How do I detach single items and all items on the individual pages?
kindly
D. -
On 9/12/2019 at 5:38 PM, carl123 said:
Your Wacom Tablet should have some sort of configuration software for it and you should be able to disable Windows Ink in that - specifically for the tablet.
I don't have Windows 10 with a Wacom Tablet attached but this is how it (the Wacom software) looks on my Windows 8.1 PC with a Wacom Tablet
Someone else may be able to show you where it is on Windows 10 if you can't find it yourself
My wacom doesn't have the option to deactivate windows ink. Likely because the last and final driver update was in 2015. But I have been told by customer support that my model of tablet is a common one among affinity users and often works fine. It works fine in Publisher and so far only gives me trouble in Designer ... for whatever reason.
-
1 minute ago, carl123 said:
Your Wacom Tablet should have some sort of configuration software for it and you should be able to disable Windows Ink in that - specifically for the tablet.
I don't have Windows 10 with a Wacom Tablet attached but this is how it (the Wacom software) looks on my Windows 8.1 PC with a Wacom Tablet
Someone else may be able to show you where it is on Windows 10 if you can't find it yourself
I saw another video about that from a guy who uses Adobe and he said that if you disable in the wacom settings like that, you lose the pen pressure sensitivity of your stylus. He then went on to explain how to manipulate Photoshop to help solve this, but since this is not an Adobe software, I didn't look into his explanation but went with the one I posted above. This is the video of the guy saying simply disabling in the wacom setting causes other problems: https://www.youtube.com/watch?v=7nL10xGIA_s
-
6 hours ago, GabrielM said:
What happens if you disable Windows Ink? Does it work properly?
Unfortunately no. I used this as a manual to disable Windows Ink: https://www.youtube.com/watch?v=TBKZbMIkb0M
-
7 minutes ago, GabrielM said:
Hi @DBerlin81,
We are aware of an issue where iff you're using a Wacom Tablet and change focus (using Alt+Tab) to a different application and then click in the Designer UI (not the document area) to return the focus, the tablet will start to draw straight lines from start to end point.
If you click in the document area to return the focus it will function correctly.
That sounds confusing, but I will just switch to changing applications via mouse click on the taskbar then. I forgot to mention another issue with the stylus, too: the hand tool (h or spacebar) doesn't work either with the stylus.This is also an issue I only have in Designer.
Thanks for the quick response. I love Affinity and am looking forward to discovering what developments are coming up in the future! -
I also have issues with my Wacom Bamboo CTH-470. According to customer Service, lots of Affinity users have that tablet and it is supposed to work fine.
My issues are that a lot of the time, the freehand drawing doesn't work. All it does is create a straight line between the starting and end point of drawing. But sometimes it works for a short moment. This happens when I use stylus and tablet. Whenever I use the mouse, freehand always works fine parallel to the stylus + tablet not working in Affinity Designer. I have been using this tablet for years in the Adobe programs and never once had any issue with it. It works fine in all other software. The driver software, which got its final update in 2015 is updated. This seems to be an issue mostly in Designer. While the freehand drawing malfunctions there, it works fine in Publisher.
Another issue I have in Designer is with brushes changing to a completely different brush when I use the keyboard shortcut to change size. I can only adjust brush size in the brushes' advanced settings. So, from where I'm sitting, it looks like Affinity still has a few significant bugs that don't exist in other software. But, I do have to say that despite that it is absolutely a fantastic alternative to the outrageously priced Adobe equivalents. I do so wish they would add the function for vectorizing pixel images, though. I know about the vectorizing alternatives, but it's a drawback in terms of workflow. -
On 3/27/2017 at 8:51 AM, MEB said:
Hi Retep,
Welcome to Affinity Forums
No, Affinity Photo/Designer doesn't have an auto-tracing feature/functionality not is able to convert a pixel selection into a vector shape at the moment.
You will have to use a third party software for that like Image Vectorizer, Vector Magic, or Super Vectorizer 2. Inkscape (open-source) also includes tracing functionality.
Your current profile image looks as though a good amount of vectorising went into the making of it. What program did you use?
-
16 minutes ago, Joachim_L said:
You had a text wrap set to the grey area, so the text jumped to the bottom of the page. Remove the text wrap for the grey area or set the Text frame to Ignore Text Wrap.
P.S.: Forget what I said about Baseline Grid.
Oh wow.
I have been trying out all sorts of functions and completely forgot that I had done that. Thanks!!!
-
31 minutes ago, Pauls said:
Can you post the sample file so we can investigate please ?
I added the .afpub
33 minutes ago, Joachim_L said:It seems to be, that you are using a baseline grid for the document and the content of the text frame might be set to align to baseline grid. Tell the text frame in Text frame panel to Ignore Baseline Grid.
But what if I do want all text in the document to align to the grid? Also, I haven't heard of the baseline grid affecting visibility of an item. But then I haven't yet heard a lot of things because I am just an advanced beginner. I did check if the "ignore baseline Grid" setting would do the trick and it had no effect.
I have a little bit of experience with InDesign & Co. and I have only started using Affinity last Friday. I'm completely thrilled with this software but still at a loss about some of the features.
I don't know if this is relevant, but it is a master page. From what I know, that shouldn't matter though. -
I created a "torn paper" object in Designer, inserted it into my Publisher file via copy+paste. I want the text field, which is the top layer, to appear at the top of the torn paper item, but the text disappears when I drag the text field over the paper. I am still new to Affinity and my guess is that I am not yet aware of a necessary setting?
Thanks in advance for helpful replies.
I did check to see if I could find a similar question in the forum. Please only reply if you have a suggestion as to what I can try to make the text show.


 Your current profile image looks as though a good amount of vectorising went into the making of it. What program did you use?


poor image on export
in Pre-V2 Archive of Affinity on Desktop Questions (macOS and Windows)
Posted
Hi All,
I have a similar issue. I made this vector file to make a recipe folder for my son. What they do is somehow engrave images onto folders that are made of wood. They ask for vector files, of course, sent either as pdf, png or jpg. I attached the pdf-file I originally sent. I got the response that it shows up somewhat blurry.
1) I created the file with all vectors, as far as I know. It has a bunch of tiny elements. Is there any way other than checking every single piece to see whether the visible elements are really all vectors?
2) I have read a lot of posts on vector brushes sometimes causing blurry problems. I used "Clean Engraving 03". For my design, I want the lines to narrow out towards each end, wide in the middle. Should I use a different brush? When I zoom into the designer file, the brush edges do come up faded. This only happens on the objects I designed for this myself and didn't copy from other files. Some of the objects this happens on are the pan, the mitten and the bacon. I also included a screenshot of that.
3) I have a hard time finding out what about my pdf-file settings might be wrong. I am attaching screen shots of the settings I have now along with the designer file.
Also: Does anyone have a tip for where to learn about the basics of pdf-settings that is not all reading? I have ADD and I learn much better through videos. Any recommendations would be greatly appreciated!
Thanks
D.
Owen Rezeptordner.afdesign Rezeptorder Din A4 Etsy_01 FILE AS WAS SENT TO SELLER.pdf