eobet
-
Posts
286 -
Joined
-
Last visited
Everything posted by eobet
-
 1. Create an Affinity Design document 2. Draw something in it 3. Add some guide lines 4. Add an art-board that's smaller than the document size Result: Guide lines not only move, but if they end up outside of the art-board, they become un-selectable. Expected: Since all curves stay in place, guidelines should also stay in place. If they end up outside the one and only artboard, they should disappear or remain selectable.
 -
Thank you for the detailed explanation! I will experiment with this.
-
For some quick and dirty photo matching 3D renders, I just bash a background photo onto a equirectangular layout and save it out as a HDR. This enables me to import it into a 3D application and use it for fake environmental lighting and reflections. However, sometimes the lighting comes out really flat, even though it's quite a high contrast photo. The reason is of course that the RGB colors in the photo doesn't have any values that extend in the HDR range. Is there a way to fake this? Is there a way to boost RGB colors into the HDR range in Affinity Photo? I tried with Gamma & Exposure in the 32-bit preview panel, but that's just a preview, isn't it?
-
There's a good solution provided here, but it only appears when you select the Move tool. Two UX improvements would be: 1. Add a "lock transform" to the context menu of each child. 2. Add a small symbol to the layers panel on each child to show that they are locked.
-
Cryptomatte support
eobet replied to 3dpartdesign's topic in Feedback for Affinity Photo V1 on Desktop
I just tried the cryptomatte output of Blender 3.1 with Affinity. Does not seem to be working very well... but I might be messing up a step or two (it doesn't work out of the box at any rate). -
It's still not enabled by default in 2022 and I checked both Mac and Windows versions. My wife refuses to move from our old Adobe CS6 license partially because of this, which was the first issue she encountered and I had to come to the forum here to look up the answer. Ridiculously, rotating through the drop down menus only rotates the image by 30 degree increments (no idea why that would be useful). Also kind of silly that those buttons are only available in develop mode (I initially looked in the regular mode's customize options and got confused when I didn't see them).
- 34 replies
-
- 1
-

-
- rotate
- develop persona
- (and 1 more)
-
This still happens quite often! Here is the bug (which in this instance did manage to draw over itself): And then when you restart:

-
Please add edge grabbing to the perspective tool
eobet replied to eobet's topic in Feedback for Affinity Photo V1 on Desktop
I just want to be able to do this in the perspective tool as well... https://imgur.com/fUF4EAe -
The only thing I'm interested in is how to retrieve the lost information in the blown highlights of the RAW file in Affinity Photo without darkening the rest of the picture.
-
Ok, I uploaded it. It's a DNG from a Leica TL2 and I used the Windows version of Affinity Photo (from the Microsoft Store).
-
Left is jpg out of the camera, right is a developed raw in Affinity Photo: Look at how blown the highlights are in the raw and how crunchy the color transitions are. I see a lot of people asking about whitepoint, and the answer is to use exposure and levels, but I can't get it to work. Why can't I get close to the jpg quality using raw? I fired up Photoshop CS6 and the difference with just dragging the whitepoint is remarkable, but then again, the colors in everything else are quite atrocious, haha:
-
Set White Point, Photoshop-style
eobet replied to JDW's topic in Feedback for Affinity Photo V1 on Desktop
The holding down Alt key to preview white and black points is neat, but there's zero hints about that in the UI itself, which results in this: There were even more threads when I searched, so I hope Affinity can make their UI about this more intuitive in the future...- 35 replies
-
- 1
-
-
- photoshop
- white point
- (and 4 more)
-
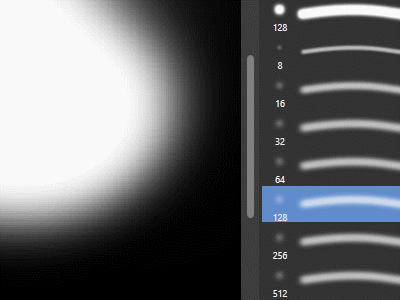
This is super cool, but I do not exactly understand how to use it on my scan result, and tutorials seem hard to come by... Here's a 100% crop of my original image: The best I've been able to get is this, but it introduces noise where there previously basically was none: And then I have to use a gaussian blur to get rid of the final pattern... am I supposed to be able to do this in one go, or how does it work in my case? I'm also confused on how this file, which is similar but which has a predominantly different halftone raster, can have such a similar pattern in that popup window...
-
I do not use global sources, yet I get a blurred result in the latest Affinity Photo in 2021: Update: Seems to be related if you managed to click on the source close to a floating point coordinate or not... which seems bad to me.
-
Offset in Designer?
eobet replied to eobet's topic in Pre-V2 Archive of Affinity on Desktop Questions (macOS and Windows)
So apparently, this thread informs me that there's a new "contour tool", but it doesn't make the workflow faster! You still loose your initial curve You still get a double offset, even if you only want one direction You still have to epxand and clean up afterwards Quite disappointed, honestly. -
AutoTrace (convert raster image to vector)
eobet replied to eross21's topic in Feedback for Affinity Designer V1 on Desktop
Had to use this at work today... and once again had to go back to Illustrator. Wow, and this thread is even older than the huge one asking for vector brushes and vector patterns? Affinity still has a long way to go until I can start recommending it to coworkers!- 473 replies
-
- 1
-
-
- designer
- vector conversion
- (and 1 more)
-
Does this massive thread encompass true vector brushes as well or patterns along paths? It's very difficult to search for answers because there's so many questions about this on this forum and a lot of what I'm getting is all the way back from 2015.
-
I tried that, but lost all the internal layers. I had to detatch the document window from the application window, and then drag everything over. Very cumbersome workaround. I expected just to be able to right-click and choose "explode embedded" or something like that.
-
Then I'm editing the embedded file. I still don't get the actual objects in the document where I dropped it.
-
I dropped an SVG into a Designer document and positioned it where I want it, and now I want to edit it, but I can't figure out which option converts it from "embedded" to actual objects...
-
Please add edge grabbing to the perspective tool
eobet replied to eobet's topic in Feedback for Affinity Photo V1 on Desktop
I can't easily make the boundaries in that tool straight/linear, so if you have a quick method for that I'm interested. -
You can only grab the corners of the border that appears with the perspective tool. Sometimes, I'd like to grab the edges too to move an entire side. Procreate on the iPad did this very well with the distort tool. Affinity should take som inspiration from that, because right now, the perspective tool is a bit cumbersome to use.
-
...but if I import the AI file directly, things look fine. Very weird. (Can't share the SVG, as it is a customer file, but it looks fine in Edge.)
-
This is the largest thread for this, so perhaps a moderator could merge these two in here as well? Interesting reflection that users have been asking for five years about this feature now... Also, this is in the desktop section, but naturally the iPad should get it too (I was using the iPad when I needed it). Plus, it should be easy to modify a curve after you've applied the perspective... that's what's missing from the workarounds currently, I suspect.
-
Designer iPad- Transform / Flip
eobet replied to JoyG's topic in Pre-V2 Archive of Affinity on iPad Questions
"Transform studio"!? Why the heck is that necessary when on the desktop you have flip button right in the top menu bar and the flyout menu bar on the iPad has lots of room? I had to search this forum just to figure out how do perform this on the iPad. I've said it before, but Affinity on the desktop is quite nice to use, but the iPad UI is convoluted and unintuitive and I avoid using it as much as possible. 🤬