Hamfast
-
Posts
5 -
Joined
-
Last visited
Everything posted by Hamfast
-
Affinity Photo 2 Icon
Hamfast replied to FestusHagan's topic in Affinity on Desktop Questions (macOS and Windows)
I don't consider my use-case as unusual, (Windows 10 Edu/Ent) and this is the first install of all my programs, which include Office 365, where the installer does NOT give the user the option to have a desktop icon or creates a desktop icon by default. The hack to use the Shell:AppsFolder admittedly works... ...but it is a obscure hack that most normal Windows users would not even know about. It is also buried in the FAQs and not pinned to the top of the FAQ list, and required a search for the term "no icons appearing on Windows 10 Desktop for Affinity Photo 2" on Google, before I found it a day later. I think Serif can do better with their documentation and overall support of this new version. The impression I get from reading the reviews of Affinity Photo 2, and the comments and feedback in the forums, is that Photo 2 is still a late Beta product that was rushed to market! The implication that the MSI will only be released later (I would assume if enough users request/complain about it) points to the fact that Serif did not do their homework and understand their user base. Photo 2, I am sure will become a better product, but not now. -
Affinity Photo 2 Icon
Hamfast replied to FestusHagan's topic in Affinity on Desktop Questions (macOS and Windows)
I am not at all happy with Serif's decision to go down the .msix path. It makes the install process and accessing the program, unnecessarily convoluted and "user-unfriendly", and takes the control and decisions away from the user, like allowing desktop icons, install paths etc. I downloaded and installed the program after I had purchased the license, and ran it to activate it, and closed the program and could find no icon on the desktop. And it didn't appear in my Windows 10 menu, neither in the Windows 10 Program Files folder under Affinity. Only after unneccessarily upgrading my Windows 10 to the latest version, (which I thought was the issue) and discovering the program now hiding in a the hidden WindowsApp folder, and running all sorts of registry hacks to get unsuccessfully get access, then I discovered that I was not alone in my issue on the Serif forums! Too late now. I have uninstalled the program and will wait until Serif come to their senses and bring back the tried and tested .MSI installer. In the meantime I will stick with V1. -
Filter Forge 9 does work *sort of* with Affinity Photo 1.7.3, but with these limitations: When you use a filter (that has the Diffuse, Bump, Normal channels active but NOT channels like Ambient Occlusion.) and you activate a channel that is normally not active in a filter and apply the filter to send back to Affinity Photo, Affinity just sits there completely locked up doing nothing. Only entering Task Manager and killing the process will allow you get control back. A workaround would be to run FF9 as a standalone, but FF9 only allows you to create a bitmap of 600 x 600. Secondly Affintiy Photo 1.7.3 only activated filters on a new document if you first fill the new empty document with a pixel layer like white...other wise all filters remain greyed out.
-
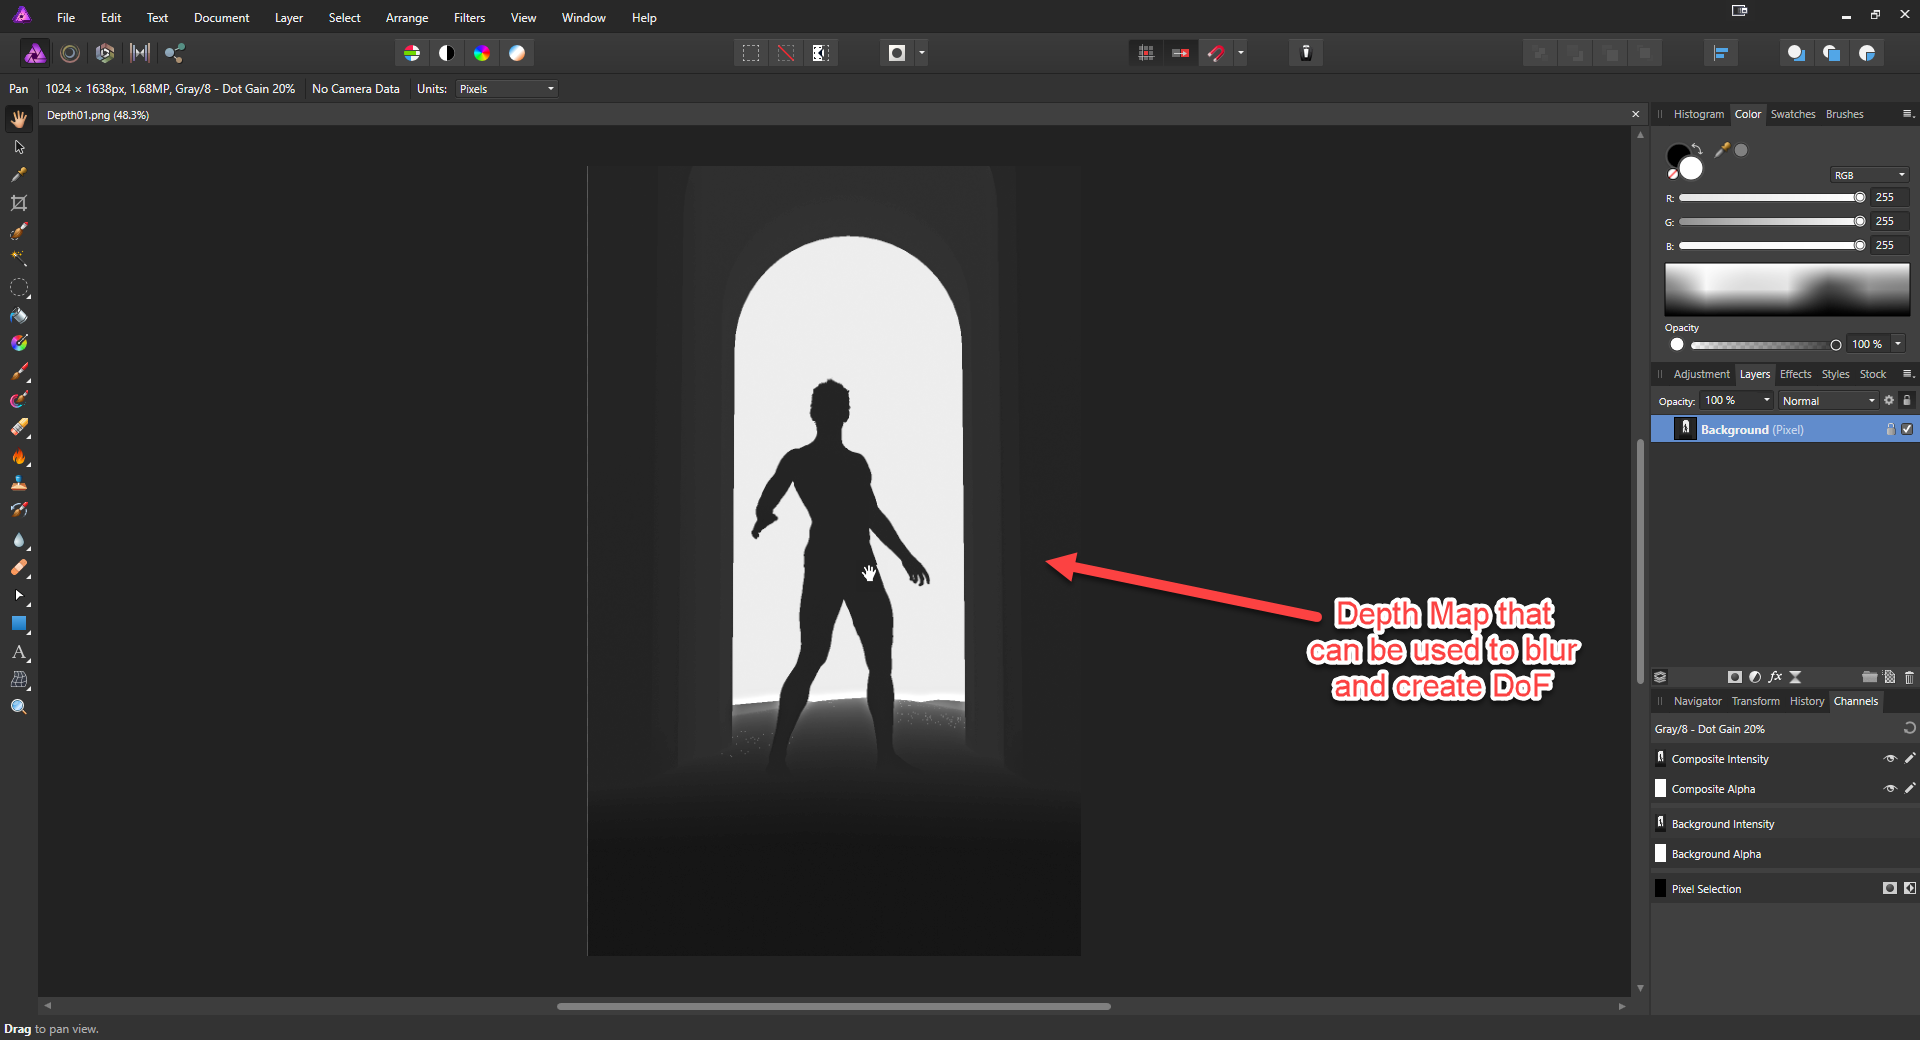
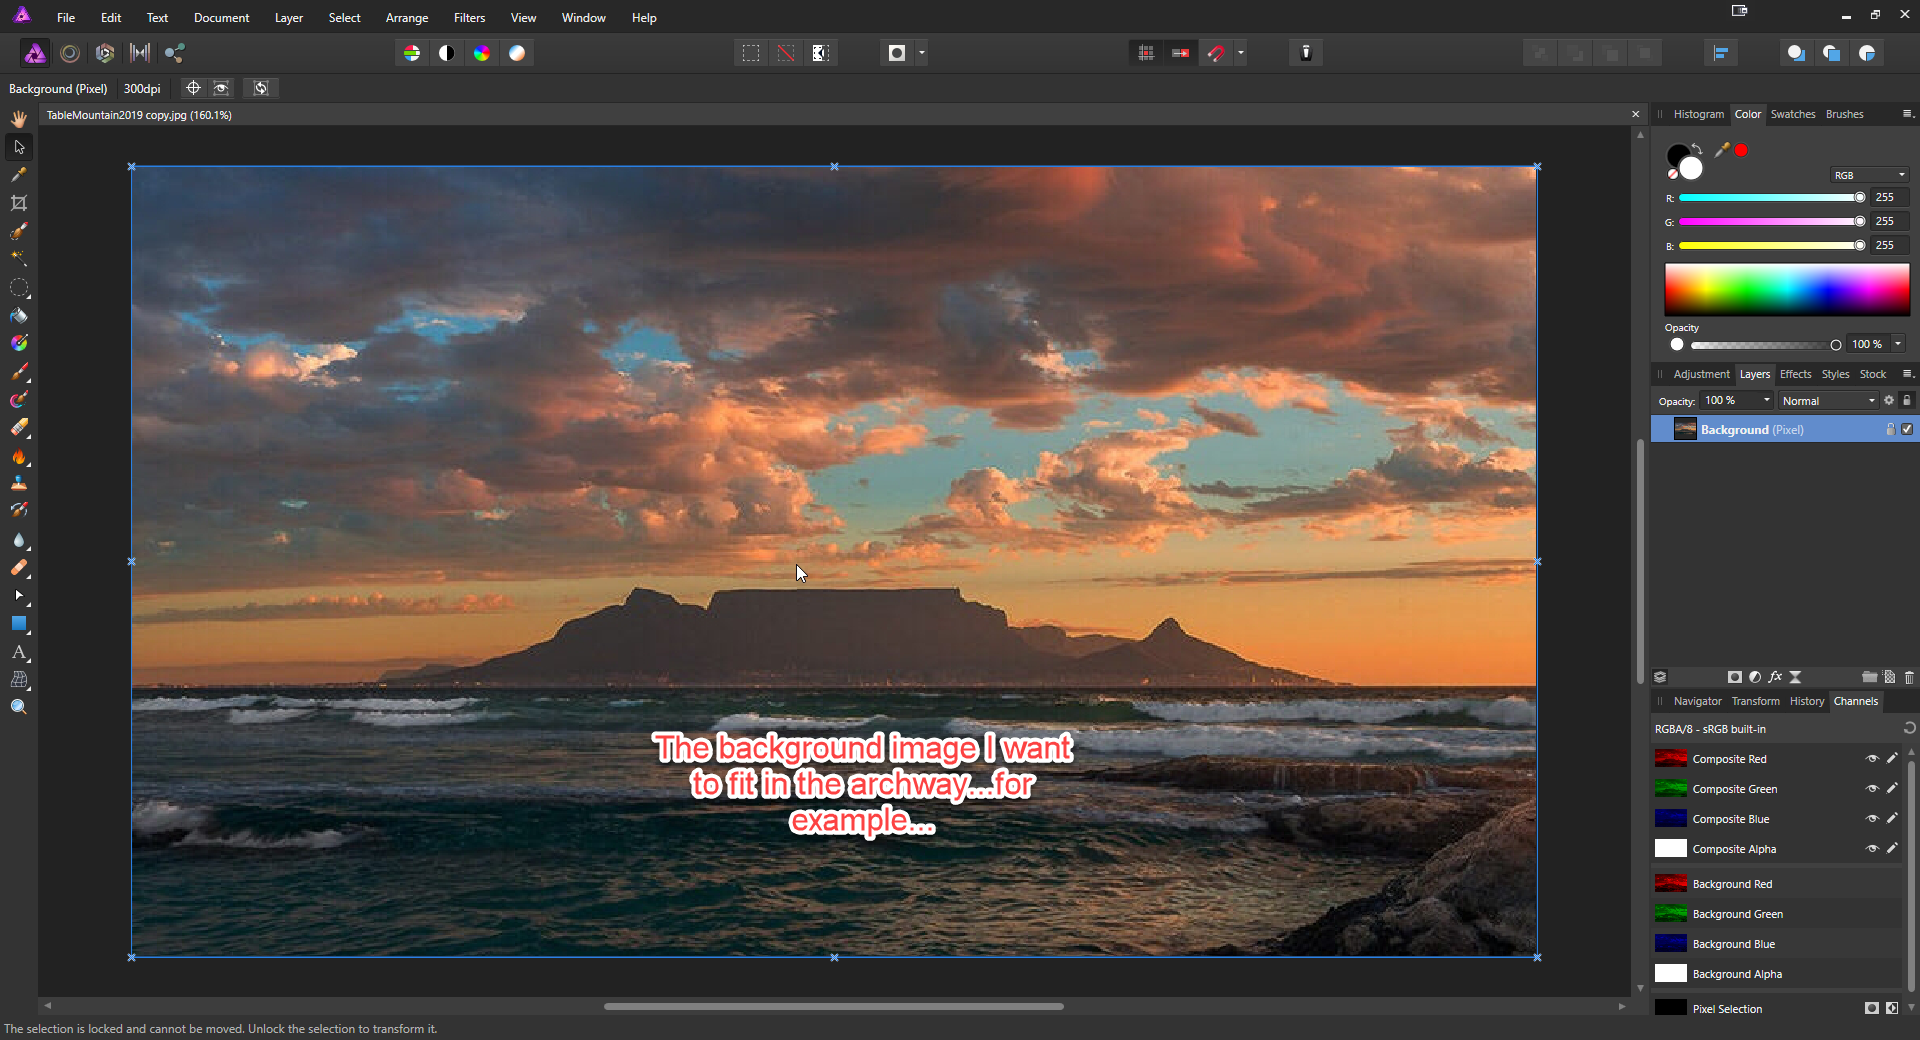
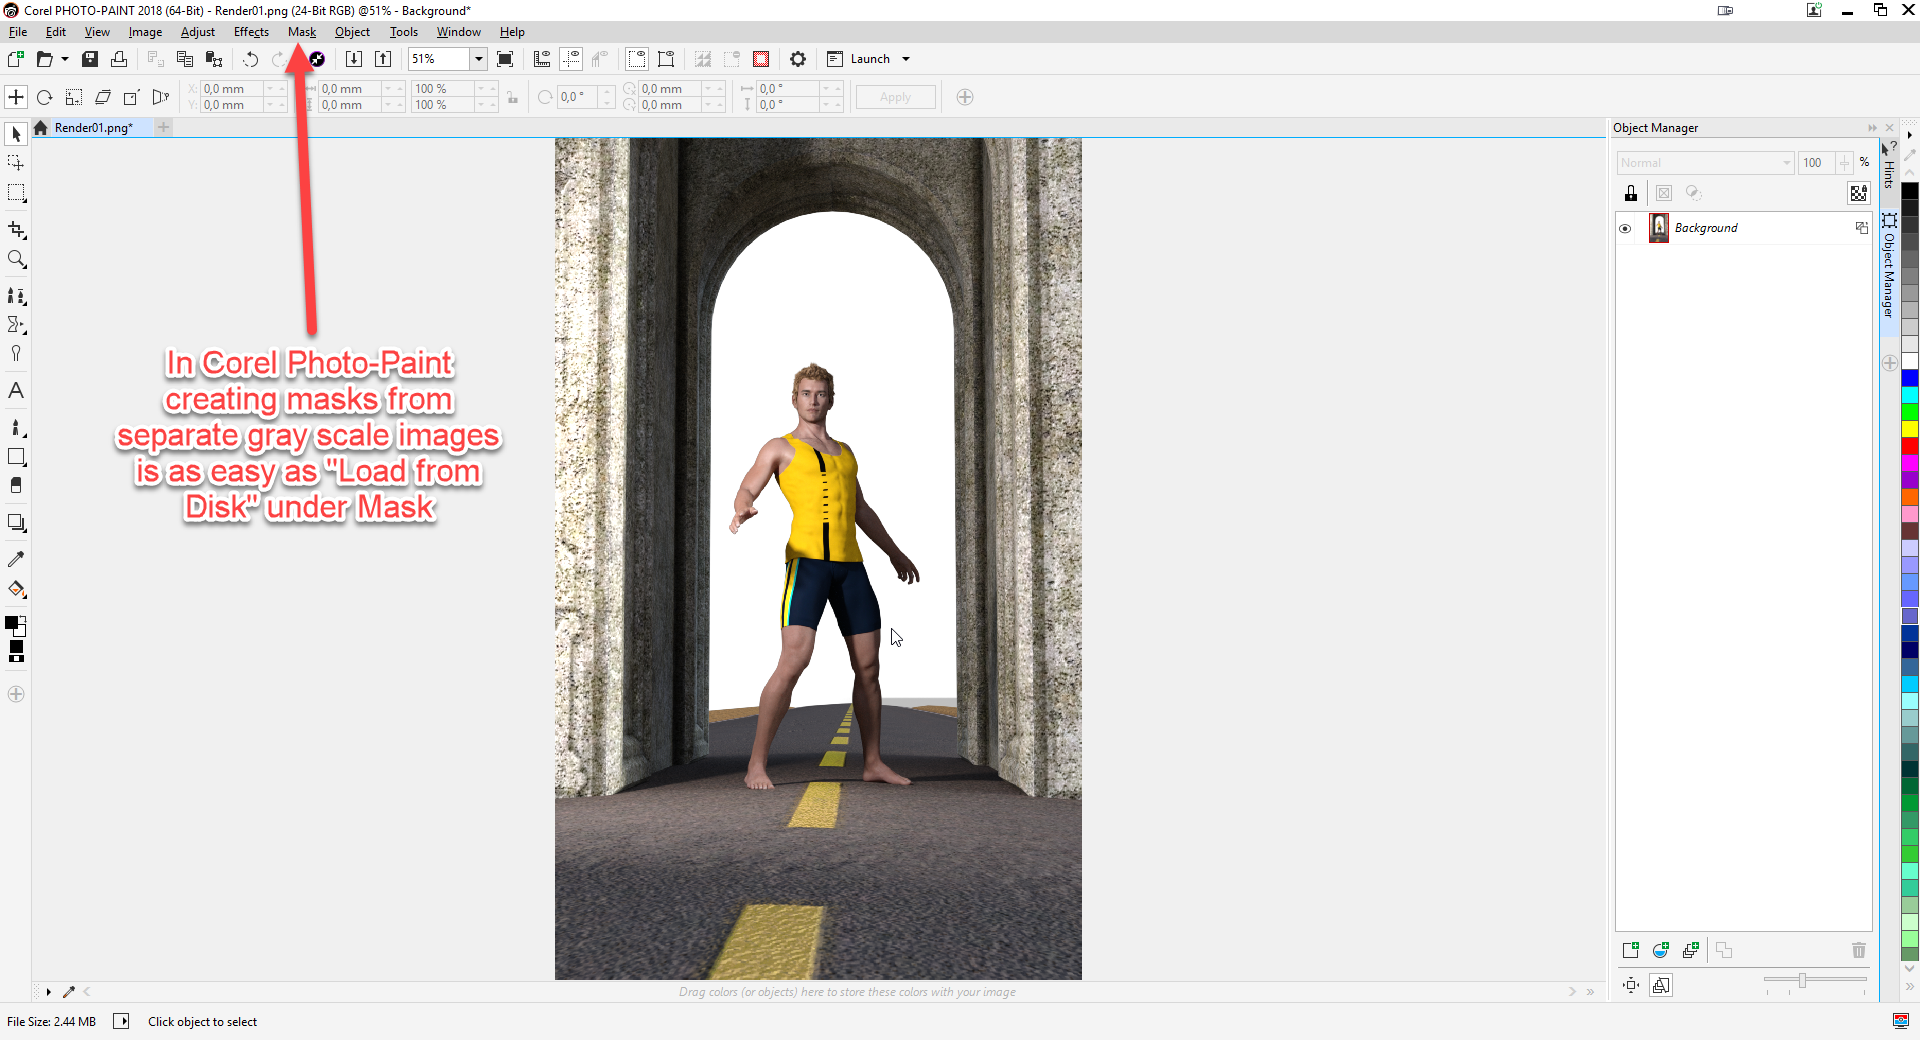
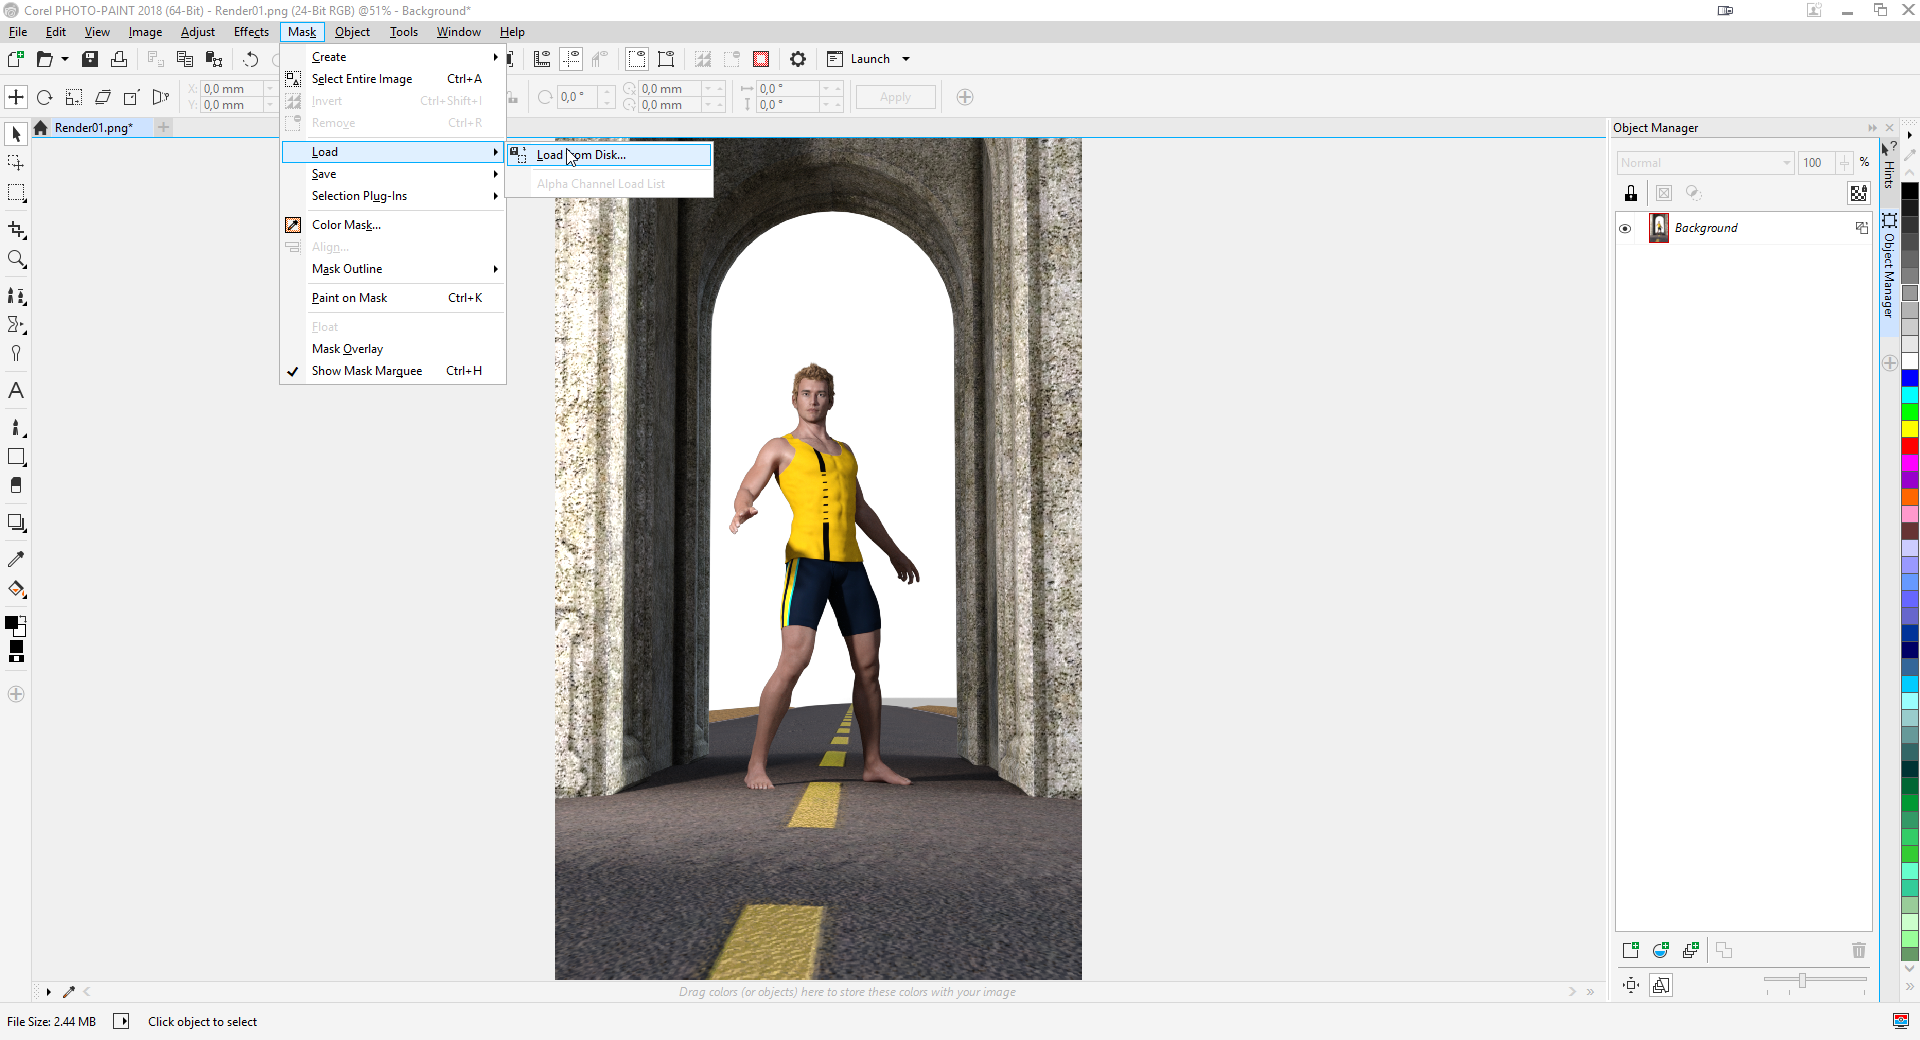
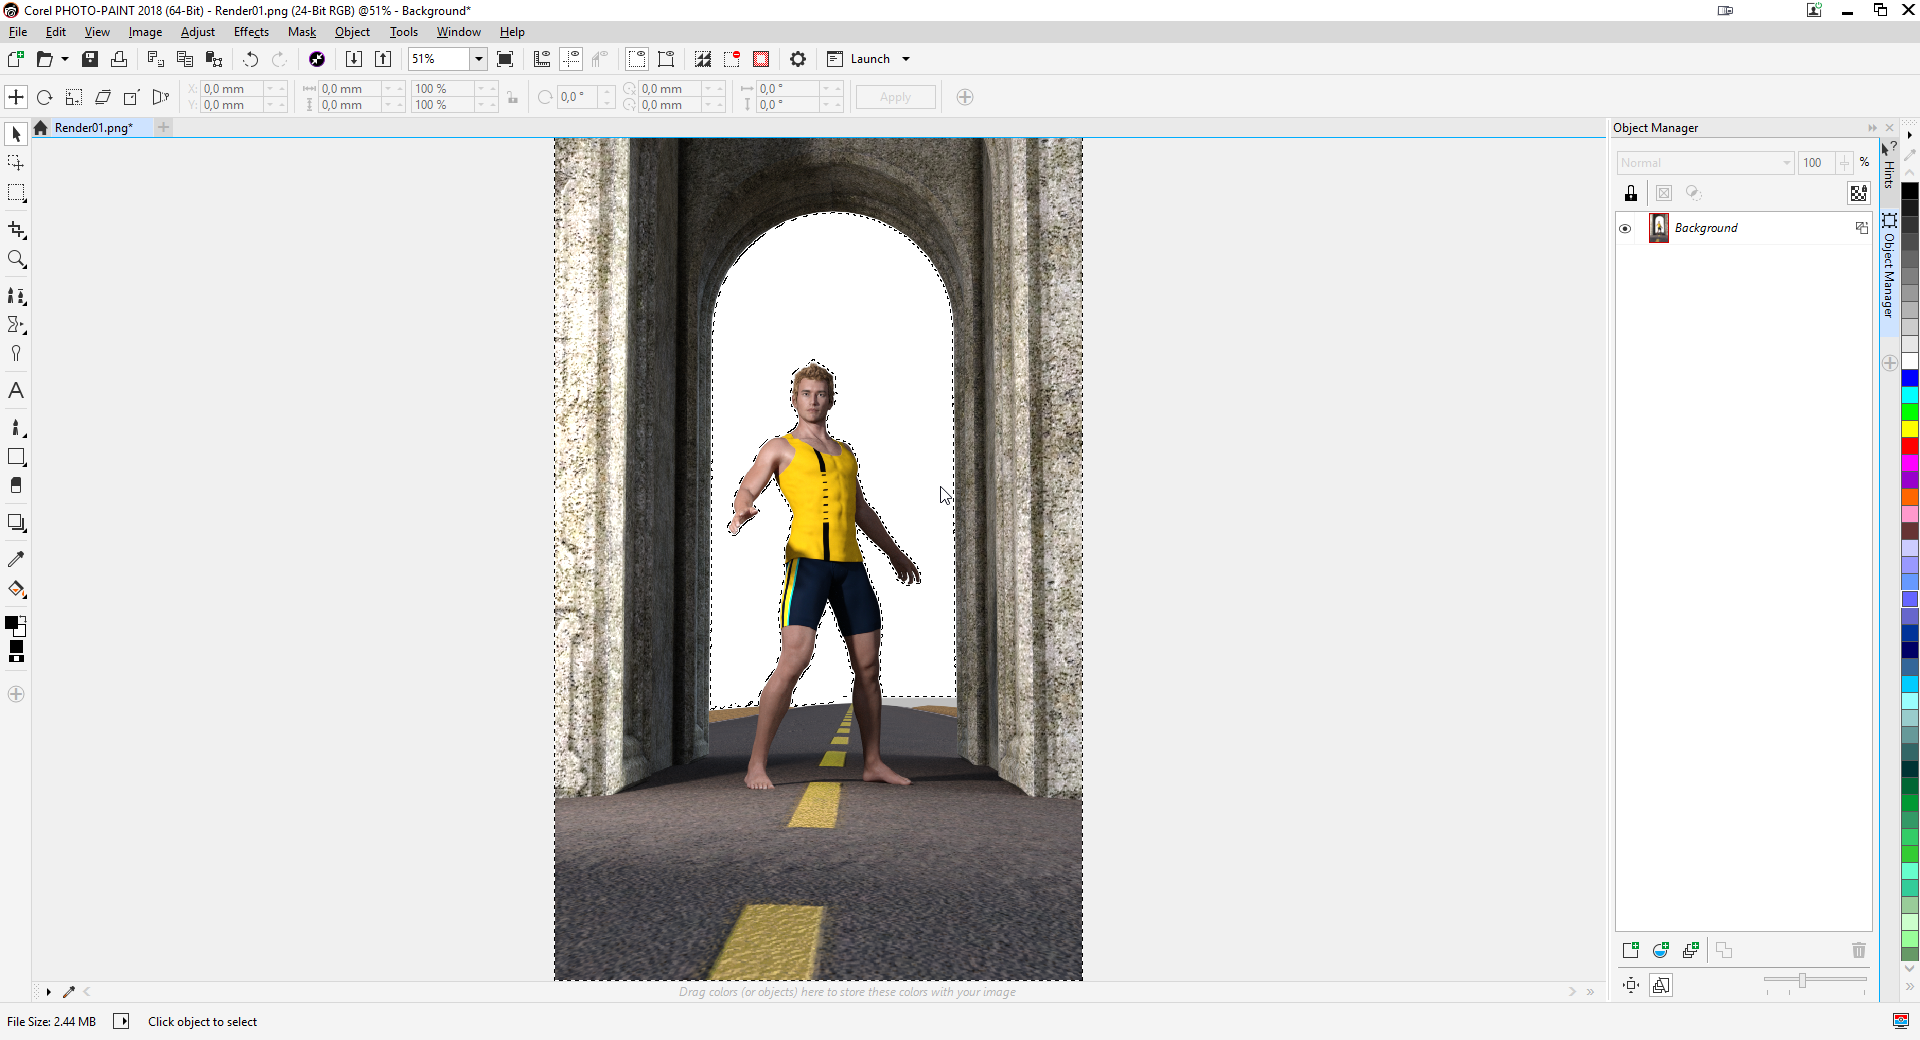
I guess I have a lot to learn, but here is what I was trying to achieve using the methods and workflow I am used to with CS6 and other more primitive editors like Corel Photo-paint. The current tutorials mostly cover creating masks from images with Adjustment Layers etc, but I cannot find one that shows you how to "import" a second gray-scale image as a mask or what workflow to use to achieve the same result. I use DAZ3D Studio to render images including various passes for depth maps and alpha maps. Combining these separate renders in Affinity Photo is what is baffling me. Below are screen dumps of what I am trying to achieve: A ordinary render with a white background appearing in the archway. a image needs to fit in that, and I have an alpha mask for that, rendered by the program as a separate canvas. The alpha mask image (a 32-bit .EXR file) The depth map that I can use to create a depth-of-field (also a 32-bit .EXR file The image I want to appear in the archway (the white part), but the workflow of pulling in the alpha mask and using it as a "ready-made mask/selection" is completely different in Affinity Photo. It was somewhat achievable in CS6. In Corel PhotoPaint it is very, very easy to do. (I installed C P-P just for this demonstration) Load the main image Use the "Load from Disk" menu item under Mask to load any grey-scale image as a mask/selection The mask selection appears which you can cut out using Ctrl-X Use the Import menu item under File to import the background image which can be scaled and placed in position. You just have to drag the background to the bottom of the stack on the right, like Affinity and Photoshop. I see no point in installing either PhotoPaint or PhotoShop Just to do this one function...There has to be a better way of doing it in Affinity....

-
I suppose a simple enough question, but I use a 3D program (DAZ3D Studio) to generate images and do multiple renders including alpha channels (in EXR files), to use as masks in an image editor like Photoshop, but since I have dropped Adobe/Photoshop and all their subscription-based products, I have yet to discover how to load a black and white image (as a selection) into an image. I don't have PS installed anymore and it makes no sense to install PS and pay subscription just to composite the renders before refining in Affinity Photo. I guess I have to unlearn before learning. The tutorials are clear enough but they only really cover creating masks an selections with existing images and not loading a second B&W image as a mask. Any pointers or suggestions?