Gianni Rondinini
-
Posts
7 -
Joined
-
Last visited
-
 Gianni Rondinini reacted to a post in a topic:
[Designer] How to set up project with multiple designs (similar layout, different colors)?
Gianni Rondinini reacted to a post in a topic:
[Designer] How to set up project with multiple designs (similar layout, different colors)?
-
 Gianni Rondinini reacted to a post in a topic:
[Designer] How to set up project with multiple designs (similar layout, different colors)?
Gianni Rondinini reacted to a post in a topic:
[Designer] How to set up project with multiple designs (similar layout, different colors)?
-
Gianni Rondinini reacted to a post in a topic:
[Designer] How to set up project with multiple designs (similar layout, different colors)?
-
I understand this is more of a workflow question than something strictly related to Affinity, but every software is born with goals in mind and I'd like to hear how you would do this in Affinity. My question applies to different works, but at present I'm working on some pirate money bills for my kids. I need to design quite some of them: 1 doubloon, 2 doubloons, 5, 10, 20, 50, ... All of the bills will have similar layout: same size, same position and room for the value (1, 2, ...), same position and room for embellishments (I found some pirate-style .svg graphics --CC license) and the like. Differences between bills are the drawings I'll place here and there (if you think of dollar bills, it could be the president name and picture), the overall color (they'll be monochrome, each of a different color) and, of course, the text telling you the value. It would be extremely useful if I could draw the first bill, then copy it and edit the needed parts, then make a 2nd copy and edit the needed parts and so on; however, as it always happens, I'm pretty sure that, as soon as end working on the butlast bill, some cool (...) idea will come to my kids minds and they'll ask me to change something here and there. I'd like to avoid starting from scratch again and/or have to change everything by hand. Here we get to my question: I thought it would be the right way to work with a number of artboards in a single document; this would make things easy to have everything in one place. But, is there a way to "link" common properties between different artboards (such as, overall dimensions) and/or objects used in artboard? For example, should I decide to change my font, is there a way to tell Affinity to change the font of a number of text objects? Should I decide to change bill size or the texture I'll use for common parts or anything else used in all of the bills. At the very center of the 1-doubloon bill, there will be a "1"; same place, same font, but different text in each of the other bills: there will be a "2", a "5", ... Same number (different size) will appear in a different place on the same bill, then it would be cool to link the text (and font, but not font size) between these text objects. I'm getting stuck to the startup of the project, as I'd like to keep the things as flexible as possible. I understand I'm asking something very complex, but if Affinity has any tool to help with any part of my problem, it would be appreciated. Thanks for any suggestion you may have.
-
Gianni Rondinini reacted to a post in a topic:
[Designer] Can Compounds be used to clip objects?
-
I've learnt of compounds after buying the Affinity Designer workbook. I like the ability to change the shape and composition of the compound any time, without destroying source parts. That's very useful during editing. The problem I'm encountering is I seem to be unable to use a compound to clip an object: is there any way to do it? I'm working on a logo made of a number of pieces (letters, numbers, irregular shapes) I'd like to use to clip a texture that I want to spread all around. I'd like to avoid converting text to curves as I can't undo and I may need to change font, font size, ... I'd to avoid repeating the texture under each element, as if we change the texture I'll have to replace it in a number of nested layers and groups. I'd like to work with a compound, as some of the shapes of the logo are still under development and may change in the future. keeping original ellipses and rectangles make editing far faster. If I nest my texture in the compound (just like I'd do with a common vector layer containing shapes) it will become part of the compound. If I nest my texture in one of the compound layers, it will show in that layer icon (but won't render as texture) and only in that layer, not all the compound. Thanks in advance! Gianni.
-
thanks, Gabe! I didn't notice transparency tool (don't have it in other image editors). using opacity on gradient didn't make it due to the way I used gradient, but transparency tool is perfect.
-
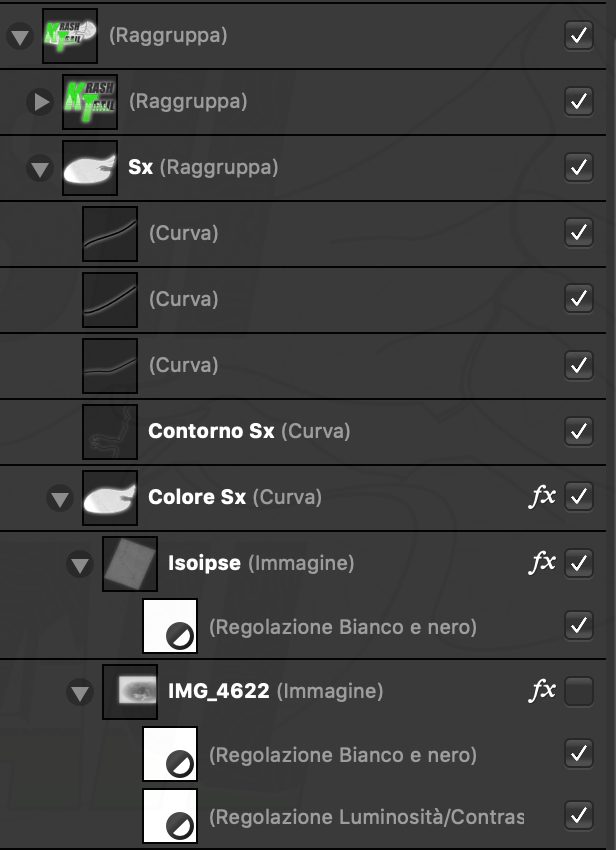
I'm unsure whether my title sounds clear to you, but I'm trying to create a 'transparency gradient' to apply to a group of levels. I'm working on a logo in which I have a background that I want to progressively become transparent from an edge to the opposite. this will be useful when using this logo as a brand on videos, as the background will "disappear" close to an edge, while remaining opaque on the opposite. background is made of a number of levels. they're nested, stacked and masked: I've got a map on which I've stacked a pattern (with a certain transparency, it's used to give some "depth"), then I took my map and nested it into a free shape I designed with the pen tool. each of the levels have some fx and/or setting levels related to it. now that I've got a "flat" background, I can't find a way to make it progressively become transparent at an edge. in the picture I attach you see, right above the red arrow, that I was able to make the background fade into flat white, but that's not the result I need. can anybody help me with this? here's my stack of levels for the left part of the background (the one I would like to fade into transparent): "Regolazione bianco e nero" is the Italian for "black & white" "Regolazione luminosità e contrasto" is the Italian for "brightness & contrast" (I know, b&c s*cks, but this time it's enough --I applied some 0.1px gaussian blur to the isoipses background, too, as I want it not to look too clear when printed). thanks in advance! gianni.