CarrotMan
-
Posts
34 -
Joined
-
Last visited
Everything posted by CarrotMan
-
@John Rostron Thanks for this tip, John. I will try it. Thanks too for showing me how to answer correctly. I did try quoting, as on some other fora, because I wanted to answer you specifically, but thought I was doing it incorrectly, so I’m glad you put me right. Julian
-
Thanks John. I suppose it has done a pretty goog job in that case, because the edges are just the fuzzy edges of weak shadows in brighter patches. I wonder whether I might be better to try what I originally thought of, and create a selection around the most blown out area, then just apply the Blend Range manoeuvre to that. Precise alignment would then be pretty irrelevant. I’m really only trying to rescue a fairly small patch of totally blown-out white. Julian
-
Thanks for the tip about lens correction. I think I re-opened the HDR merge in Develop to use the CA removal tool, but I will try developing each file individually and then merging them. I’m on my iPad at the moment and haven’t got access to Affinity, but think I can only access the CA removal option in Develop, but that defringeing is available in both Develop and Photo? To get rid of all the fringeing I had to use both tools. Julian
-
Many thanks John. I will try this. Presumably align will align everything perfectly. The blend ranges seemed to do the trick. I was very happy with the conversion I had made until I noticed the weird ghosting. I will try again tomorrow. I’ve spent too long on my laptop today and am going cross-eyed! Thanks too for the tip about the screen grab. I do screen grabs all the time on iPad but I couldn’t think how to do it with Affinity open on the laptop. Julian
-
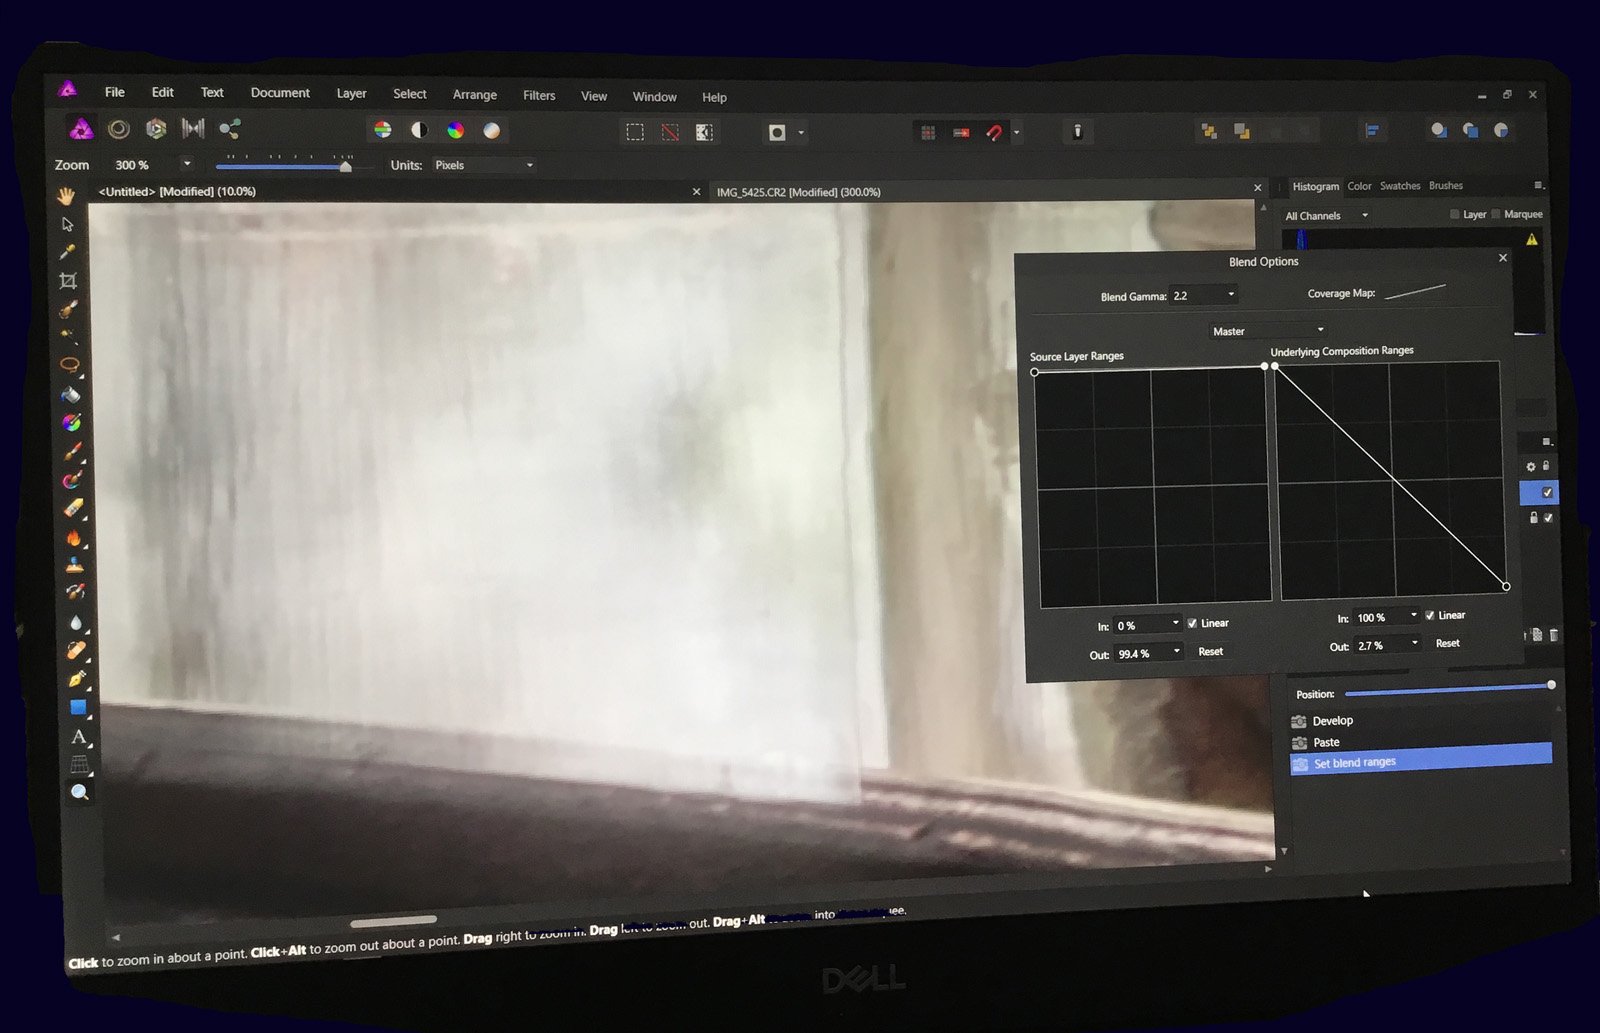
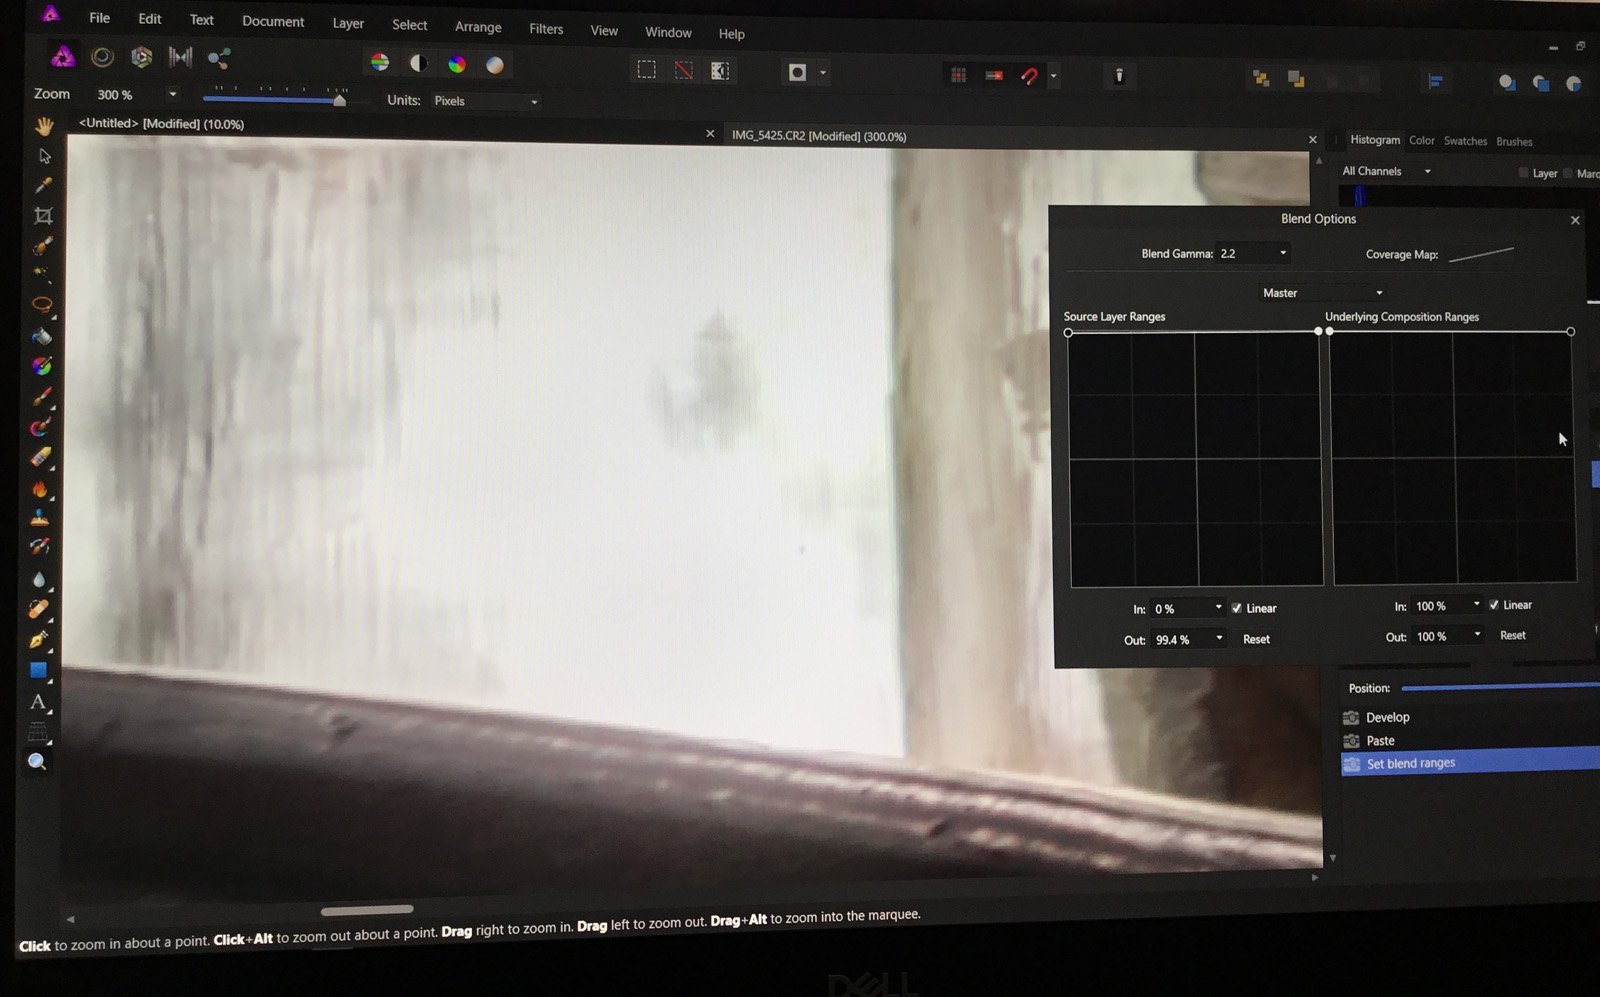
I can't seem to get an image to precisely fit over another and would appreciate some guidance. I've combined 3 raw exposures of the same scene (+1, 0, -1 EV; shot with tripod) in HDR merge. I should really have taken another, darker shot too, because the highlights are still a bit blown. So I've taken the darkest raw again, and reigned in the highlights. If I copy and paste the HDR merge over this darker layer and then use the Blend Options Underlying Composition Ranges tool, I can get the result I want exposure-wise. The problem is that I'm clearly not overlaying the HDR layer precisely over the darker layer, because I'm getting a bit of ghosting (first image), and in fact I can see a little "checkerboard" pattern to the side of the image . It should look like the second image. (It is a whitewashed stone column behind a wooden bench). Please excuse the poor laptop screen images snapped with iPad. Thanks, Julian

-
Thanks. I’ll try the routine in this video on a few images that I think would benefit from it.
-
Apologies if this is already covered: I had a look but maybe missed it. I am rather confused by the ability to re-open the “Develop Persona” after leaving it and using the functions in the “Photo Persona”. My normal workflow in PSE was to import a TIFF which I had already converted from a raw in say Canon DPP, and then work on it. Upon exporting as a TIFF from DPP, my white balance was irreversible. I have the option of doing the same with Affinity Photo (ie importing a TIFF developed from a raw in another program) or I can now simply open the raw in Affinity, and then develop it in “Develop”, which then automatically opens it in the “Photo Persona”. What I don’t understand is the option of being able to re-enter the “Develop Persona” after applying edits in the “Photo Persona”. I have read that it allows the use of the specific tools provided in “Develop”, but surely that can’t mean that I can change my mind about a white balance after I had pressed the “develop” button when first leaving “Develop”? I’ve read that one can open JPEG’s in “Develop”, but the white balance is surely irreversibly “baked into” this file format? But maybe white balance can be changed prior to committing to TIFF format at export? So, which tools are unique to “Develop” which I can’t find in the “Photo Persona”.
-
Many thanks for the answers and suggestions. I did try manually inputting my value greater than 100 into the box (Windows version) and I seemed to have a problem with the program hanging up, but it may just have been a coincidence. I’ll have another try later today, and also follow the videos.
-
I’ve had a look at some posts but didn’t seem to find a specific answer to this. I often make two conversions from a single raw landscape photo, one for the sky and one for the land, and then combine them. In Photoshop Elements I copy and paste the “land” version over the “sky” version, select the sky, feather the edge c. 150 px and then delete the overexposed sky to reveal the sky I want, nicely merged into the correctly exposed land. My question is in two parts: 1) Can the edge in AP be feathered by as much as 150 px (Photoshop allows even more). AP seems to allow a max of 100 px though I may be mistaken. What settings should I use in the dialog box? 2) Perhaps more significantly, can I do the whole combining exposures thing less laboriously? I must confess that I’m not really au fait with masking but feel I should try to get to grips with it. BTW, I have done some 3 exposure HDR merges (building interiors shot with tripod) and I am very happy with the results, but didn’t want to do pseudo HDR from one raw with my landscapes. Thanks, C