razorpig
-
Posts
86 -
Joined
-
Last visited
Everything posted by razorpig
-
Thanks MikeTO ! That's fantastic. Very relieved I don't have to do it all again. Hope they can fix it soon
-
I've just formatted a fiction book in Publisher. I now want to add the front matter and thought it would be simple case of adding pages before the first page but when I try to do this, all my previously formatted content disappears. Any idea what might be causing this? I'm using a single facing spread Master Page. Please advise - I really don't want to start over !
-
@thomaso Thanks for the additional info. Very useful. This was only happening in a few documents. When I find another one with the same issue I'll check the Paragraph Decoration - this is something I didn't check before. It was happening with the Artistic Text tool, not the Text Frame tool. Also, now that you mention it - I think maybe I didn't save the defaults, but just re-saved the document. I definitely saved something ! I'll double check when I come across another document with the same issue and report back. Thanks again !
-
@carl123 Fantastic ! That worked 👍 Thank you. For anyone else having the same issue, I first had to revert then save the defaults.
-
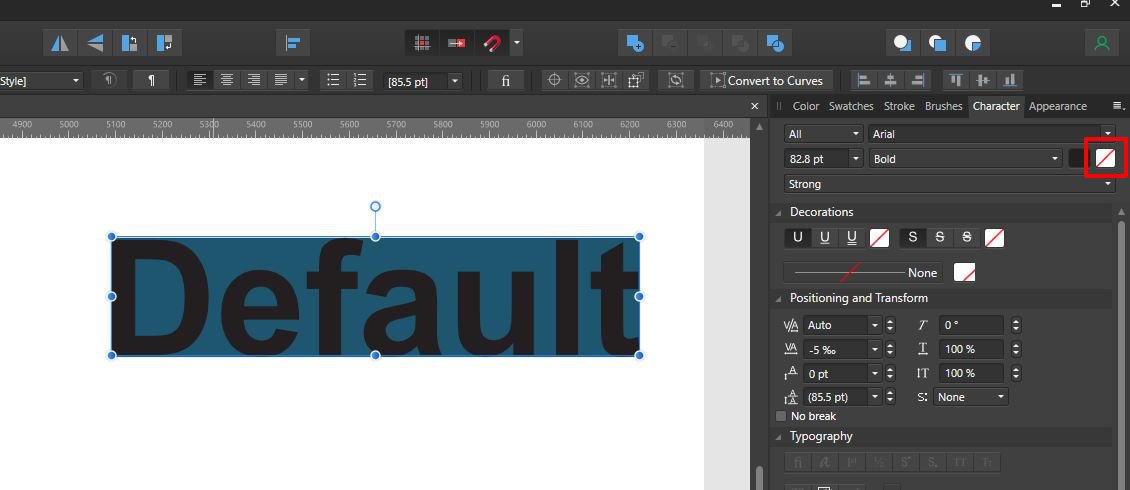
Hi Ron, There's no background colour assigned in the character panel when I add new text (see attached) - that's what I don't understand. The only way I can create normal text is to copy some that looks OK. Any text I add using the artistic text tool has that dark background, even though it looks fine in the character panel ??? I'm stumped !

-
It's either a bug or more likely I've clicked something by accident, but my default text has a dark blue background (see attached). It's likely a silly oversight but I can't get rid of it. To create new text I'm just duplicating and editing a piece of text that looks normal. So annoying ! 🙂Any ideas?
-
Hi, Is there any way to adjust the node handles evenly and at the same time, just by dragging one of them? I've tried all the normal shortcuts, also Googled for a solution but so far found nothing. Someone said right click and drag one handle and the opposite handle will mirror the movement. I couldn't get this to work. I'm using Windows.
-
FontBase : auto-activation request
razorpig replied to razorpig's topic in Feedback for Affinity Designer V1 on Desktop
@RNKLN Yes I did reach out to FontBase initially. They've tried to contact Serif several times but haven't had a reply. They suggested if a few Affinity users put in the request, maybe it would get things moving. This was my motivation for posting - let's see what happens. Personally I'm not very hopeful ! @myclay Thanks for the suggestion ! I'll definitely check that out. -
FontBase : auto-activation request
razorpig replied to razorpig's topic in Feedback for Affinity Designer V1 on Desktop
@Bryan Rieger Thanks Bryan. I appreciate the suggestion, but unfortunately it looks like macOS only. -
Hi, I reached out to the FontBase team recently to ask if they had auto-activation for Affinity apps on their road map. Apparently they have contacted you guys several times about this but they haven't had a reply. FontBase and Affinity are such great pieces of software, it would be amazing if they could talk to each other. Hope something can be done. If more users can get behind this maybe it will happen.
-
OK that's great. Once again thanks for the detailed explanation - I'm so grateful there's folks like you who are willing to take time out of their day to help people like me. Getting back to the main thread - I understand about color gamuts but you lost me a bit at 'CMYK ramp' - not to worry, I think I understood most of your post. Those articles were very informative. I'm in the process of creating a selection of gradients using different techniques to send to the printer. I already have a fully rasterized version (TIFF) and also one with 2% noise added ( monochromatic, Gaussian ). Interestingly, after your earlier post I exported a PNG version of the gradient from a 16-bit RGB document and it looks great when placed inside the original CMYK/8 file and exported to PDF. I'm going to try one more variation as follows ( I don't really know if or why it would make any difference ) - instead of using a gradient with two color stops, I'm going to use one as a solid background color, and place the second one on top with a gradient from 100% to 0% opacity. At the risk of going over board with my gratitude, thanks again !
-
I'm currently using a rectangle with a gradient fill. When you suggest using a PNG image source, do you mean I should try exporting my 16-bit RGB vector object/gradient background as a PNG, and then place it back in the original CMYK/8 document as an image object?
-
@Lagarto Thanks ! That's great information. I really appreciate you taking the time to explain this for me. I do have Publisher but wasn't using it in this instance. I'll definitely check out the Resource Manager. I would normally do as you suggested and work in CMYK/8 from the start. The only reason I've altered this workflow is because I'm trying to troubleshoot a separate 'banding' issue with printed gradients ( they look fine on screen ). I was experimenting to see if creating the gradient in 16-bit RGB and converting to CMYK during export would help. I've started a separate thread for that issue : I spoke with the printer - they said some gradients print better than others but couldn't offer me any further advice, apart from suggesting I remove the gradients altogether, which I would like to avoid if possible. Anyway, that's a separate issue so I probably shouldn't ramble on about it here ! Thanks again for your time.
-
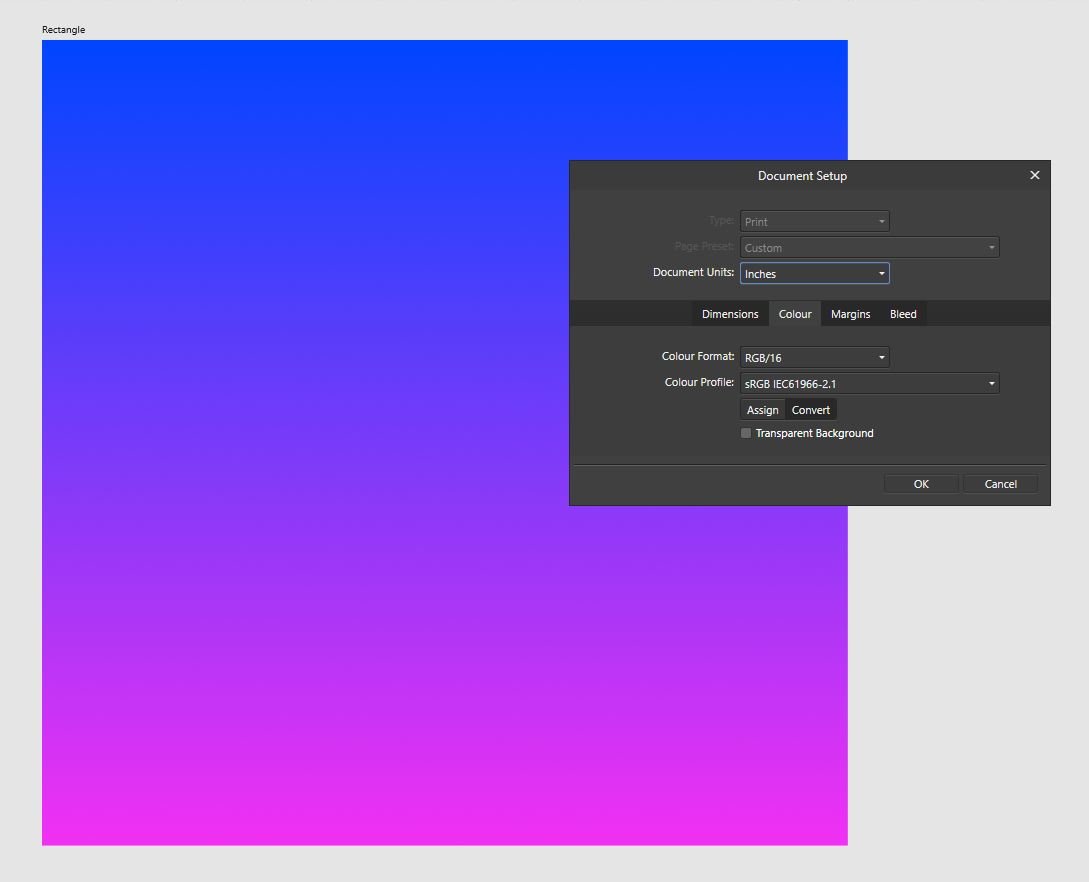
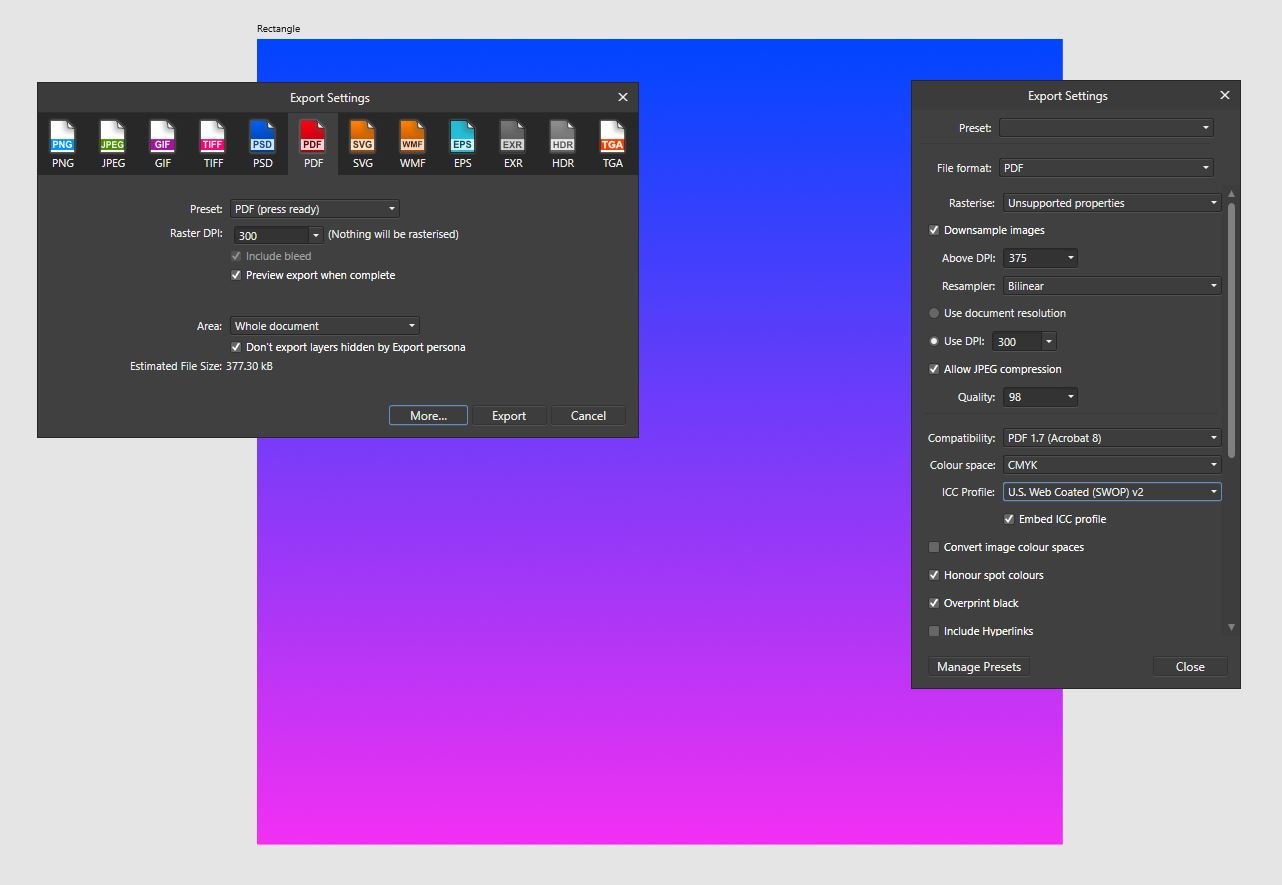
I have a 16-bit RGB document ( see rgb16.jpg ). I've exported this as a PDF with Color Space set to CMYK, Color Profile set to U.S. Web Coated (SWOP) v2, and Embed ICC Profile checked ( see export.jpg ). When I view the exported file info in XNView MP the color profile is listed as Artifex Software sRGB ICC Color Profile ( see info.jpg ). In Adobe Bridge the color profile of the exported PDF is Untagged. I find this color profile stuff so confusing, even after so many online articles and videos about color management. Can someone perhaps explain what's happening in this instance, and why the color profile is not listed as CMYK? Hopefully then I can start to get a grip on it. Thanks in advance. Additionally if anyone can recommend any good books, sites, videos or articles about color management, color spaces, ICC profiles etc that would also be very much appreciated.
-
@Dan C Thanks again Dan - I appreciate your time. Having browsed other topics, I suspect it might be related to using a combination of a gradient with a transparency mask, but I'm not sure. Hopefully someone else can help.
-
@Dan C Thanks Dan - this did occur to me but I didn't see an option for CMYK/16 in the Document Setup ( see attached )
-
I'm creating a document for print. Initially I had a rich black background ( I checked with the printer first and they said it would be fine ) and a smaller content area with a vertical gradient ( blue to rich black ) - See ARTBOARD A in the attached file. This gave me some really nice deep blues in the gradient. The printer then decided I couldn't use rich black after all ( !! ) so I had to change both the background and gradient stop to key black, but this left the gradient looking very dull, grey and washed out ( see ARTBOARD B ). I'd like to retain the look of the original gradient if possible. Obviously if I only change the background to key black and keep the rich black in the gradient, the inner frame is visible ( see ARTBOARD C ). The best solution I can come up with is to keep the rich black in the gradient, and use the transparency tool to fade it out towards the top ( see ARTBOARD D ) - this looks great on screen but causes banding when I print the exported PDF. Does anyone know how I can address these banding issues? Or what's causing it in the first place? I need to export the file as a PDF - I've tried lots of different settings. Hopefully the attached file will explain it better than I did ! Document palette is included in the file with blue, rich black and key black. Smooth Gradient.afdesign
-
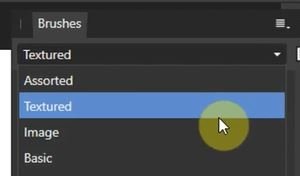
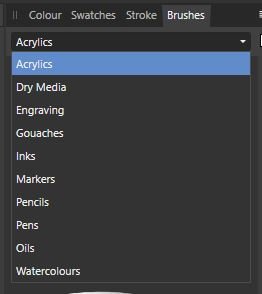
Hi, In the Draw persona I'm just looking for simple a drop down list with basic brushes ( see brushes_1.jpg ) but all I see is a list of more artistic brush categories ( brushes_2.jpg ). What happened to the Basic, Image and Textured categories?
-
Thanks to everyone for their contributions. Really appreciate it. I must have inadvertently flipped the object. Flipping it back sorted it out. @Gear maker Baseline was set to 0
-
@Alfred Thanks Alfred - really appreciate you taking the time to reply. Very disappointing though - this is way too much effort for something that should be pretty simple. I'll just type +70px in the Transform box each time, unless there's a keyboard shortcut to repeat all those steps ( * add a thick stroke to the circle; * menu "Layer → Expand Stroke"; * menu "Layer →Geometry → Separate Curves"; * select the inner circle; * ) ?
-
I'm trying to create a series of evenly spaced concentric shapes using power duplicate. I used CTRL + J then increased the overall dimension by adding +70px in the Transform panel ( see transform.jpg ). Using power duplicate after this ( CTRL+ J ) I thought all the subsequent shapes would be 70px apart, but the gap increases exponentially ( see result.jpg ). How can I get the power duplicate function to just add 70px each time?
-
@firstdefence Thanks for that - it's complicated to explain but there's a reason why I did't really want to use this method. It means I have to take several steps backwards and create my design again. Nevermind, I think that's what I'll have to do. Seems crazy that this is the default behaviour for text on a path ( at least in this case ). @G13RL Thanks for your input also - much appreciated.
-
....then I get this ???
-
When I try to type text on a path it's backwards, like it's being reflected in a mirror ( see attached ). I have no idea why this is happening and it's driving me crazy. Any help would be very much appreciated.
-
@R C-R In my original example I was snapping to the grid, but without it, you're correct, the snap settings don't appear to work. I've tried Align to nodes of selected curves on the context toolbar, also Snap to object bounding boxes, Snap to shape key points and Snap to object geometry under snapping options. None of these work but dragging out a horizontal guide and snapping to that is a workaround. Do we think this is a bug? I thought Snap to shape key points should probably work, as we are using the point transform tool.